> ## Documentation Index
> Fetch the complete documentation index at: https://developers.chatwoot.com/llms.txt
> Use this file to discover all available pages before exploring further.
# AWS Marketplace AMI Deployment
> Deploy Chatwoot on AWS using the marketplace AMI listing
# AWS Chatwoot Deployment Guide
The following is the guide for deploying Chatwoot on AWS using the marketplace listing. Use our helm charts with AWS Elastic Kubernetes Service(EKS) for a cloud-native deployment.
## Prerequisites
* AWS account
## Install Chatwoot via AWS Marketplace AMI
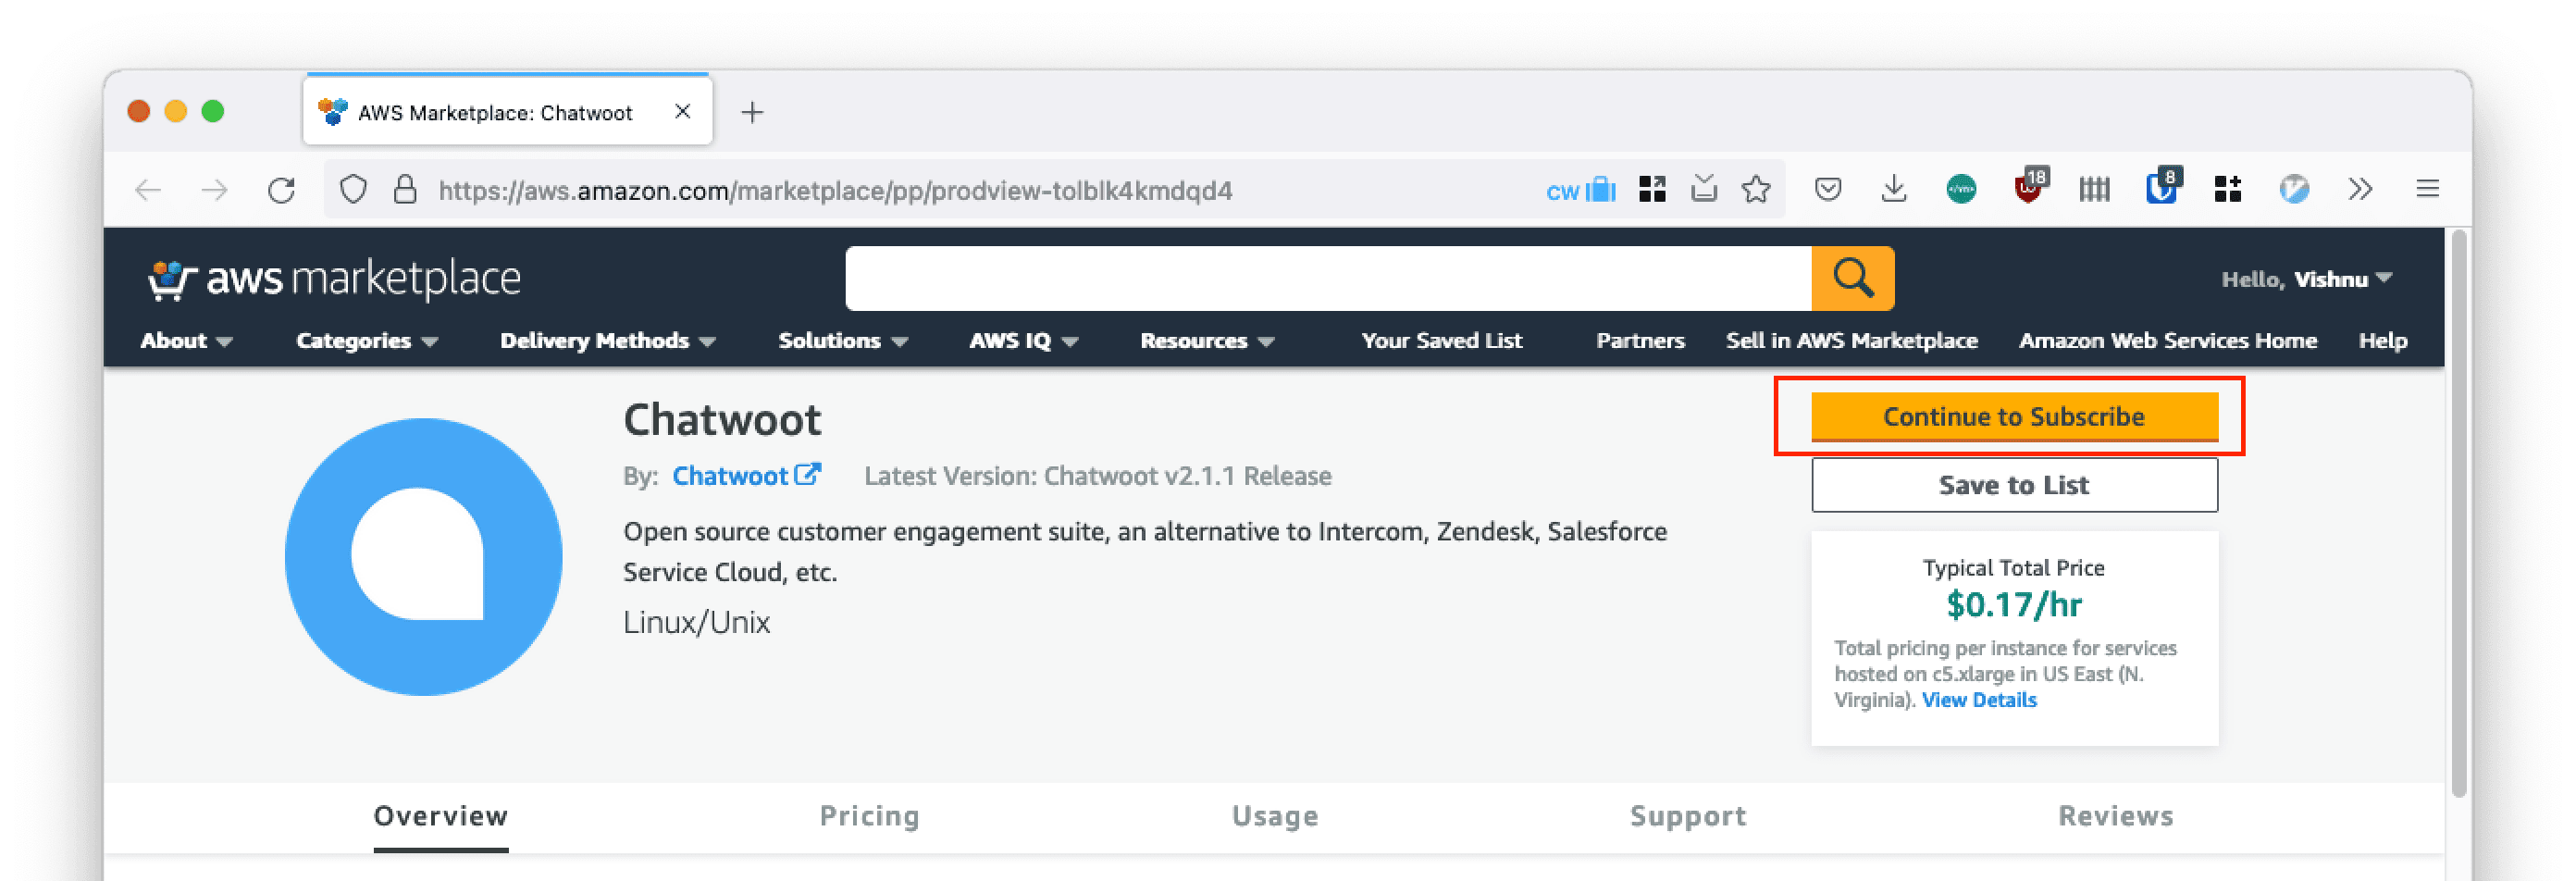
### Step 1: Subscribe to Chatwoot
1. Go to [Chatwoot AWS marketplace listing](https://aws.amazon.com/marketplace/pp/prodview-tolblk4kmdqd4) and click on **Subscribe**.
 ### Step 2: Sign In
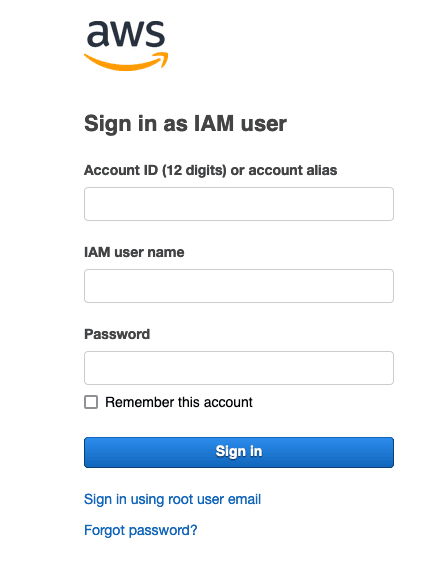
2. Sign in with your AWS account.
### Step 2: Sign In
2. Sign in with your AWS account.
 ### Step 3: Continue to Configuration
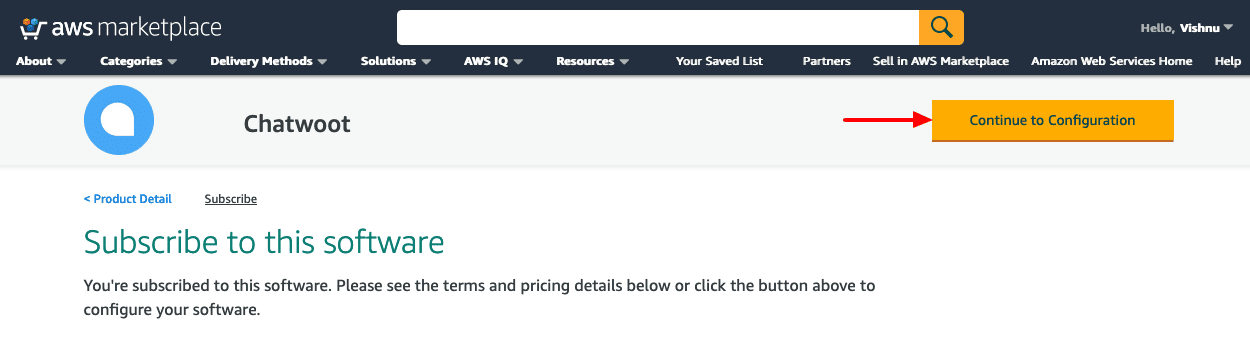
3. Click on **Continue to Configuration**.
### Step 3: Continue to Configuration
3. Click on **Continue to Configuration**.
 ### Step 4: Configure Software
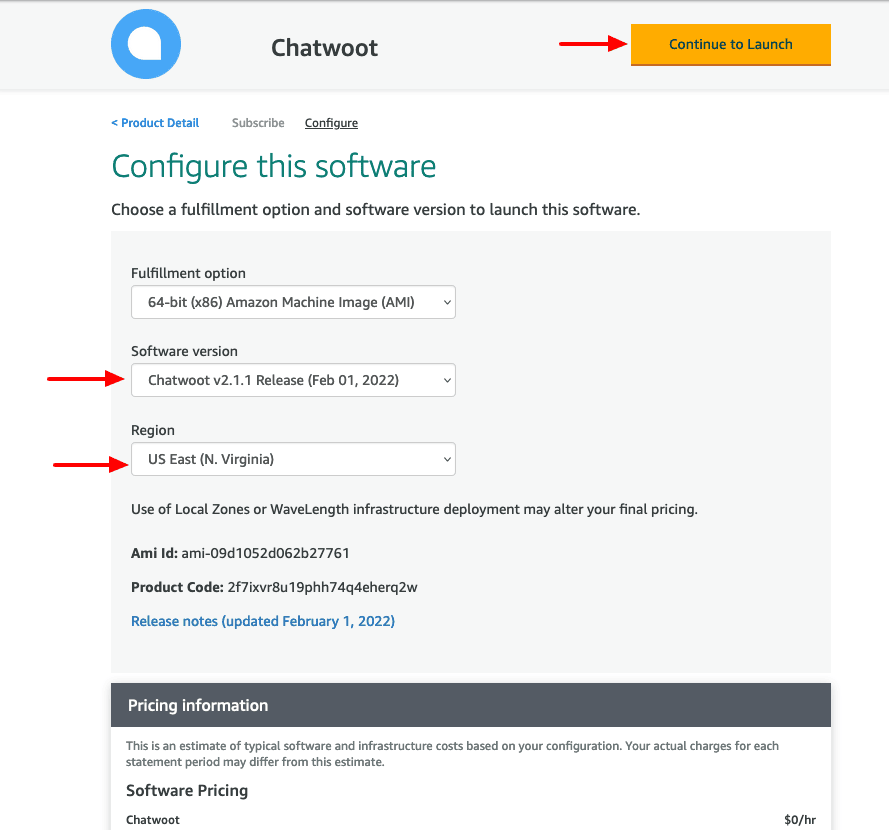
4. Select the latest version in **Software Version** and pick your AWS **region**. Click **Continue to Launch**.
### Step 4: Configure Software
4. Select the latest version in **Software Version** and pick your AWS **region**. Click **Continue to Launch**.
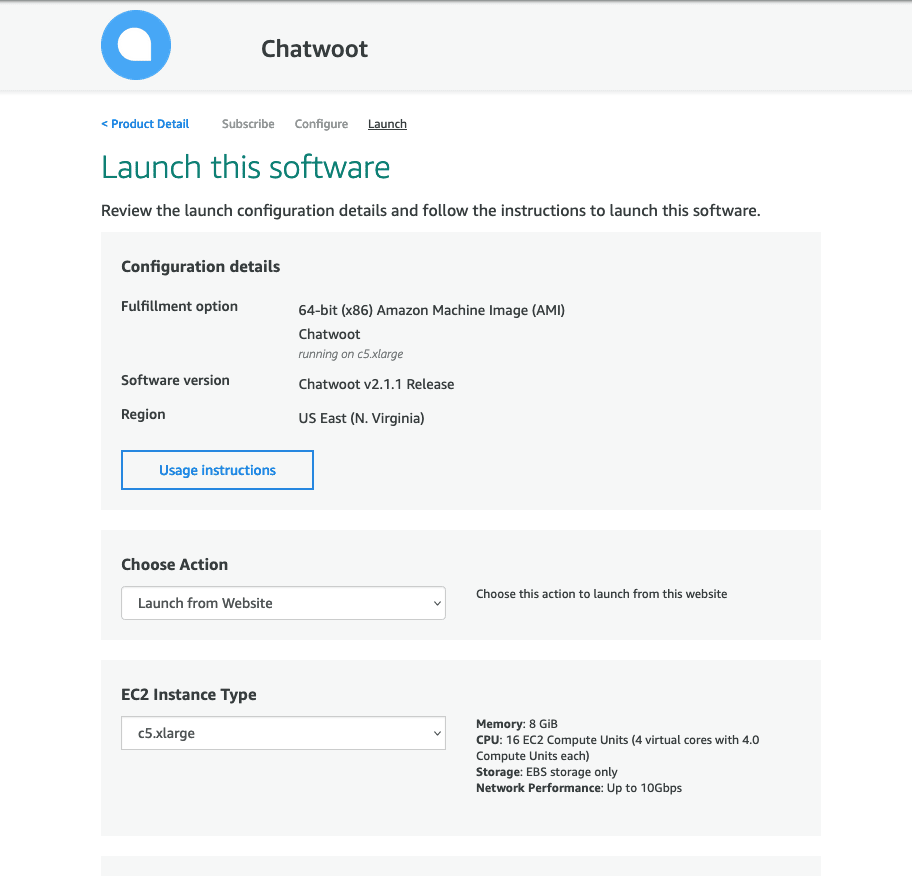
 ### Step 5: Launch Configuration
5. Review the launch configuration. Leave the **Choose Action** field with the default value **Launch from Website**. Choose a VPC and subnet as per your AWS region preference.
### Step 5: Launch Configuration
5. Review the launch configuration. Leave the **Choose Action** field with the default value **Launch from Website**. Choose a VPC and subnet as per your AWS region preference.
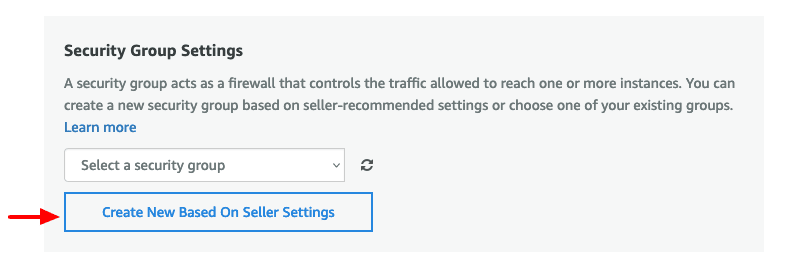
 ### Step 6: Create Security Group
6. Scroll down to the **Security Group** section and click **Create New Based On Seller Settings**.
### Step 6: Create Security Group
6. Scroll down to the **Security Group** section and click **Create New Based On Seller Settings**.
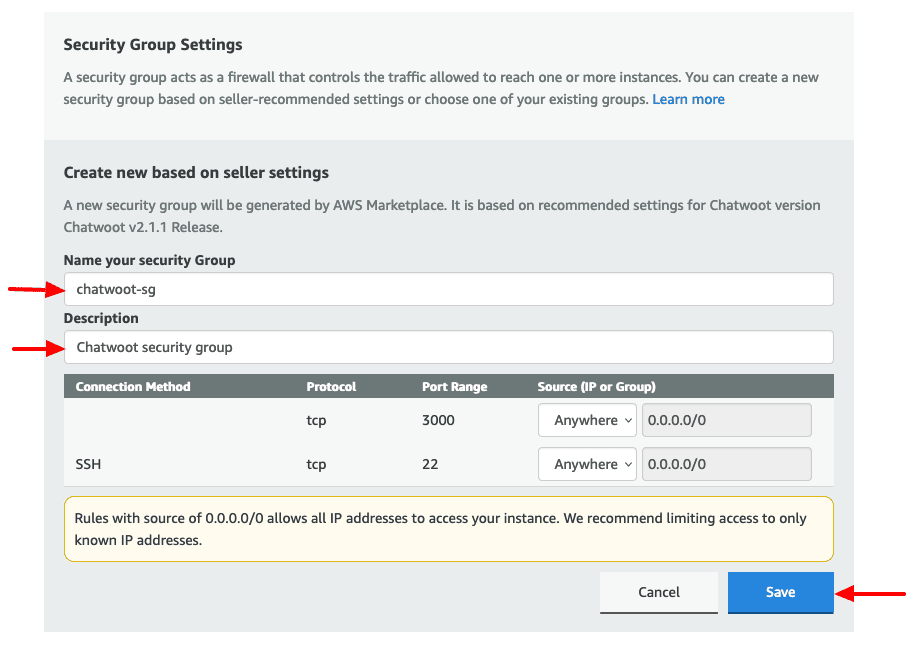
 ### Step 7: Save Security Group
7. Save the new security group and choose it after creation.
### Step 7: Save Security Group
7. Save the new security group and choose it after creation.
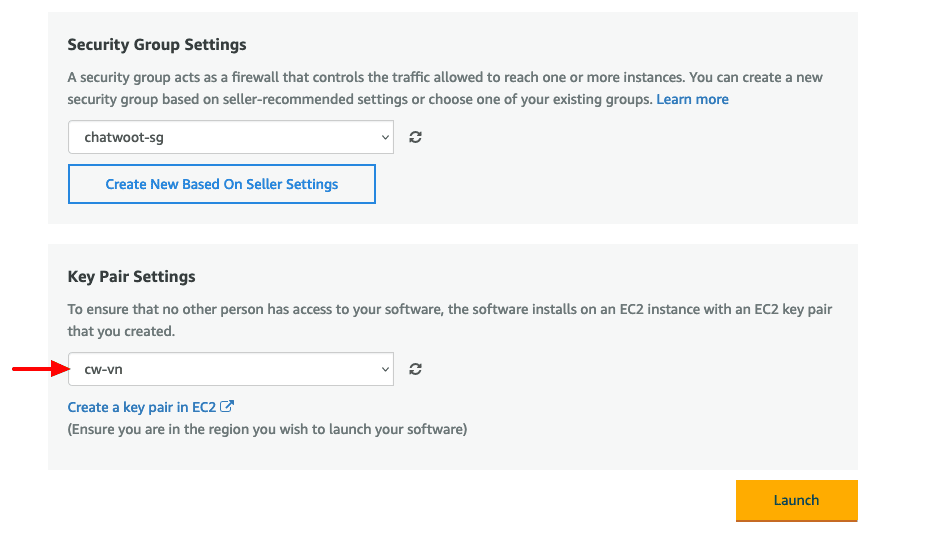
 ### Step 8: Configure Key Pair
8. Pick a key pair you already have or create a new one in the region you are deploying. Click **Launch**.
### Step 8: Configure Key Pair
8. Pick a key pair you already have or create a new one in the region you are deploying. Click **Launch**.
 ### Step 9: Launch Confirmation
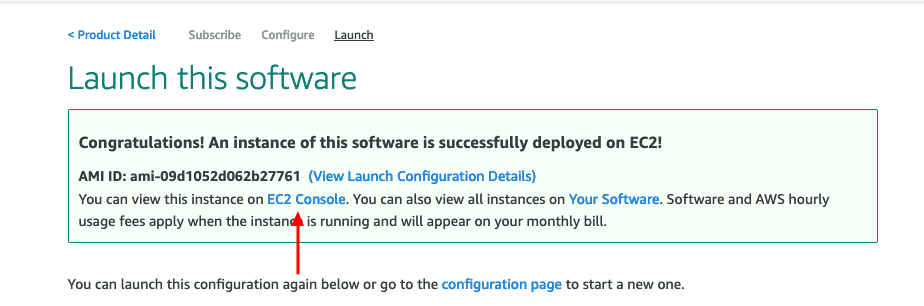
9. AWS should now display a congratulations screen confirming that Chatwoot instance is launched successfully. Click on the **EC2 Console** link.
### Step 9: Launch Confirmation
9. AWS should now display a congratulations screen confirming that Chatwoot instance is launched successfully. Click on the **EC2 Console** link.
 ### Step 10: Wait for Instance
10. Wait for a few minutes to let the instance come up.
### Step 10: Wait for Instance
10. Wait for a few minutes to let the instance come up.
 ### Step 11: Get Public IP
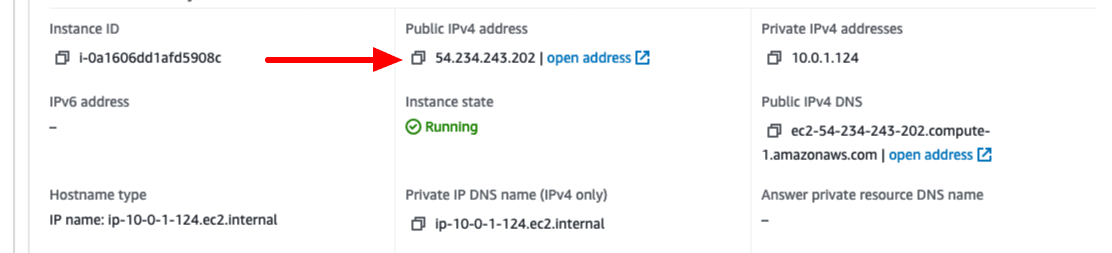
11. Select the instance and copy the public IP.
### Step 11: Get Public IP
11. Select the instance and copy the public IP.
 ### Step 12: Access Chatwoot
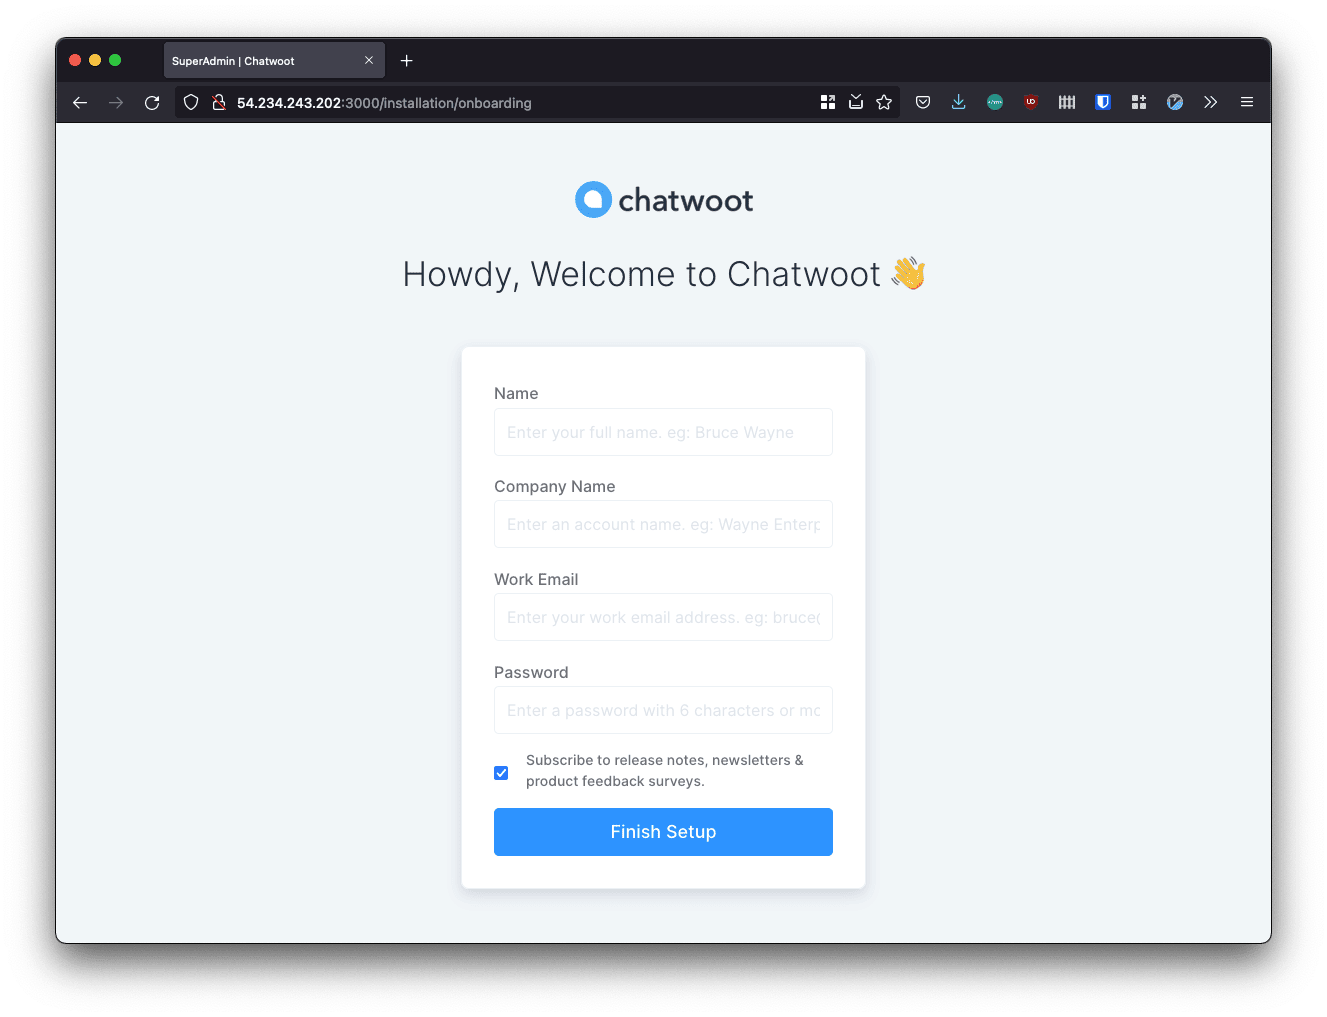
12. Visit `http://:3000`. This should bring up the Chatwoot UI. Congratulations. Woot! Woot!!
### Step 12: Access Chatwoot
12. Visit `http://:3000`. This should bring up the Chatwoot UI. Congratulations. Woot! Woot!!
 ### Step 13: Configure Production URL and SSL
For production deployments, associate an Elastic IP with the EC2 instance so the public IP does not change after restarts. Then create a DNS `A` record for your domain or subdomain pointing to that Elastic IP.
After the DNS record resolves, connect to the instance and run:
```bash theme={null}
sudo cwctl --webserver
```
This configures Nginx and SSL for your Chatwoot instance.
## Configuring Chatwoot
To configure Chatwoot, we need to SSH into the instance. We will use **AWS Console Connect** for this.
### Step 1: Connect to Instance
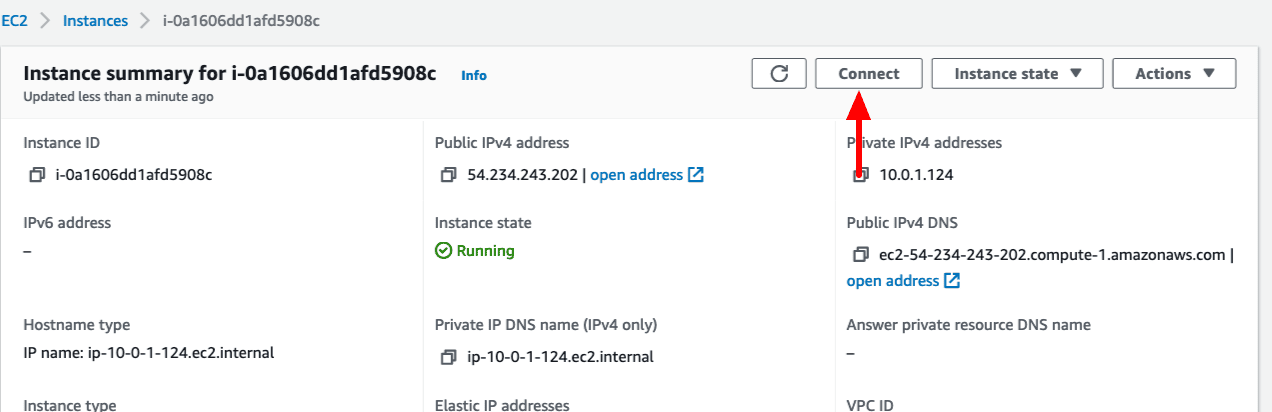
1. Select the instance and click on **Connect**.
### Step 13: Configure Production URL and SSL
For production deployments, associate an Elastic IP with the EC2 instance so the public IP does not change after restarts. Then create a DNS `A` record for your domain or subdomain pointing to that Elastic IP.
After the DNS record resolves, connect to the instance and run:
```bash theme={null}
sudo cwctl --webserver
```
This configures Nginx and SSL for your Chatwoot instance.
## Configuring Chatwoot
To configure Chatwoot, we need to SSH into the instance. We will use **AWS Console Connect** for this.
### Step 1: Connect to Instance
1. Select the instance and click on **Connect**.
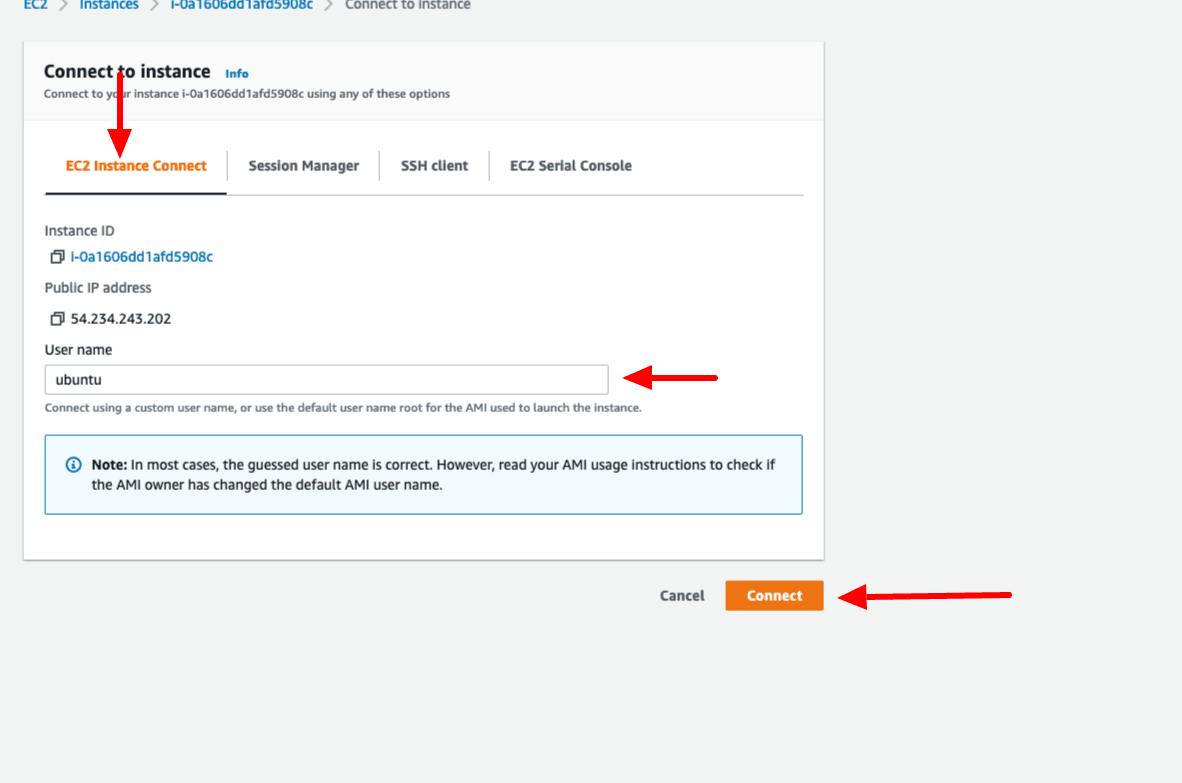
 ### Step 2: Use Ubuntu User
2. Change the username from `root` to `ubuntu` and click **Connect**.
### Step 2: Use Ubuntu User
2. Change the username from `root` to `ubuntu` and click **Connect**.
 ### Step 3: Configure Environment Variables
3. Switch to the `chatwoot` user and configure the necessary environment variables. Refer to [Environment variables](/self-hosted/configuration/environment-variables) document for the complete list.
```bash theme={null}
sudo -i -u chatwoot
cd chatwoot
vi .env
```
For production, configure Nginx and SSL after pointing your domain to the instance. See [Chatwoot CTL](/self-hosted/deployment/chatwoot-ctl#setup-nginx-with-ssl-after-installation).
## Updating the Instance
Please follow the Chatwoot update process in the standard [Linux VM setup](/self-hosted/deployment/linux-vm).
## Security Recommendations
### SSL Configuration
* Set up SSL certificates using Let's Encrypt or AWS Certificate Manager
* Configure Nginx as a reverse proxy
* Update security group rules to allow HTTPS traffic (port 443)
### Access Control
* Restrict SSH access to specific IP addresses
* Use IAM roles for EC2 instances where possible
* Enable AWS CloudTrail for audit logging
### Backup Strategy
* Set up automated EBS snapshots
* Configure database backups
* Store backups in S3 with appropriate lifecycle policies
## Troubleshooting
### Common Issues
**Problem**: Cannot access Chatwoot on port 3000
**Solutions**:
* Check security group allows inbound traffic on port 3000
* Verify instance is running and healthy
* Check if Chatwoot service is running: `sudo systemctl status chatwoot`
**Problem**: Chatwoot service fails to start
**Solutions**:
* Check logs: `sudo journalctl -u chatwoot -f`
* Verify environment variables are correctly set
* Ensure database connection is working
* Check disk space and memory usage
### Support Resources
* [AWS Support](https://aws.amazon.com/support/)
* [Chatwoot Community Discord](https://discord.com/invite/cJXdrwS)
* [GitHub Issues](https://github.com/chatwoot/chatwoot/issues)
***
The AWS Marketplace AMI provides a quick way to deploy Chatwoot with pre-configured settings. For production use, ensure you implement proper security measures and backup strategies.
### Step 3: Configure Environment Variables
3. Switch to the `chatwoot` user and configure the necessary environment variables. Refer to [Environment variables](/self-hosted/configuration/environment-variables) document for the complete list.
```bash theme={null}
sudo -i -u chatwoot
cd chatwoot
vi .env
```
For production, configure Nginx and SSL after pointing your domain to the instance. See [Chatwoot CTL](/self-hosted/deployment/chatwoot-ctl#setup-nginx-with-ssl-after-installation).
## Updating the Instance
Please follow the Chatwoot update process in the standard [Linux VM setup](/self-hosted/deployment/linux-vm).
## Security Recommendations
### SSL Configuration
* Set up SSL certificates using Let's Encrypt or AWS Certificate Manager
* Configure Nginx as a reverse proxy
* Update security group rules to allow HTTPS traffic (port 443)
### Access Control
* Restrict SSH access to specific IP addresses
* Use IAM roles for EC2 instances where possible
* Enable AWS CloudTrail for audit logging
### Backup Strategy
* Set up automated EBS snapshots
* Configure database backups
* Store backups in S3 with appropriate lifecycle policies
## Troubleshooting
### Common Issues
**Problem**: Cannot access Chatwoot on port 3000
**Solutions**:
* Check security group allows inbound traffic on port 3000
* Verify instance is running and healthy
* Check if Chatwoot service is running: `sudo systemctl status chatwoot`
**Problem**: Chatwoot service fails to start
**Solutions**:
* Check logs: `sudo journalctl -u chatwoot -f`
* Verify environment variables are correctly set
* Ensure database connection is working
* Check disk space and memory usage
### Support Resources
* [AWS Support](https://aws.amazon.com/support/)
* [Chatwoot Community Discord](https://discord.com/invite/cJXdrwS)
* [GitHub Issues](https://github.com/chatwoot/chatwoot/issues)
***
The AWS Marketplace AMI provides a quick way to deploy Chatwoot with pre-configured settings. For production use, ensure you implement proper security measures and backup strategies.