> ## Documentation Index
> Fetch the complete documentation index at: https://developers.chatwoot.com/llms.txt
> Use this file to discover all available pages before exploring further.
# DigitalOcean Chatwoot deployment guide
> Deploy Chatwoot on a single droplet in DigitalOcean
This guide will deploy chatwoot on a single droplet in DigitalOcean. For a cloud native deployment, go with
our [1-click k8s app on DigitalOcean Marketplace](https://marketplace.digitalocean.com/apps/chatwoot).
## Create a Droplet (VM)
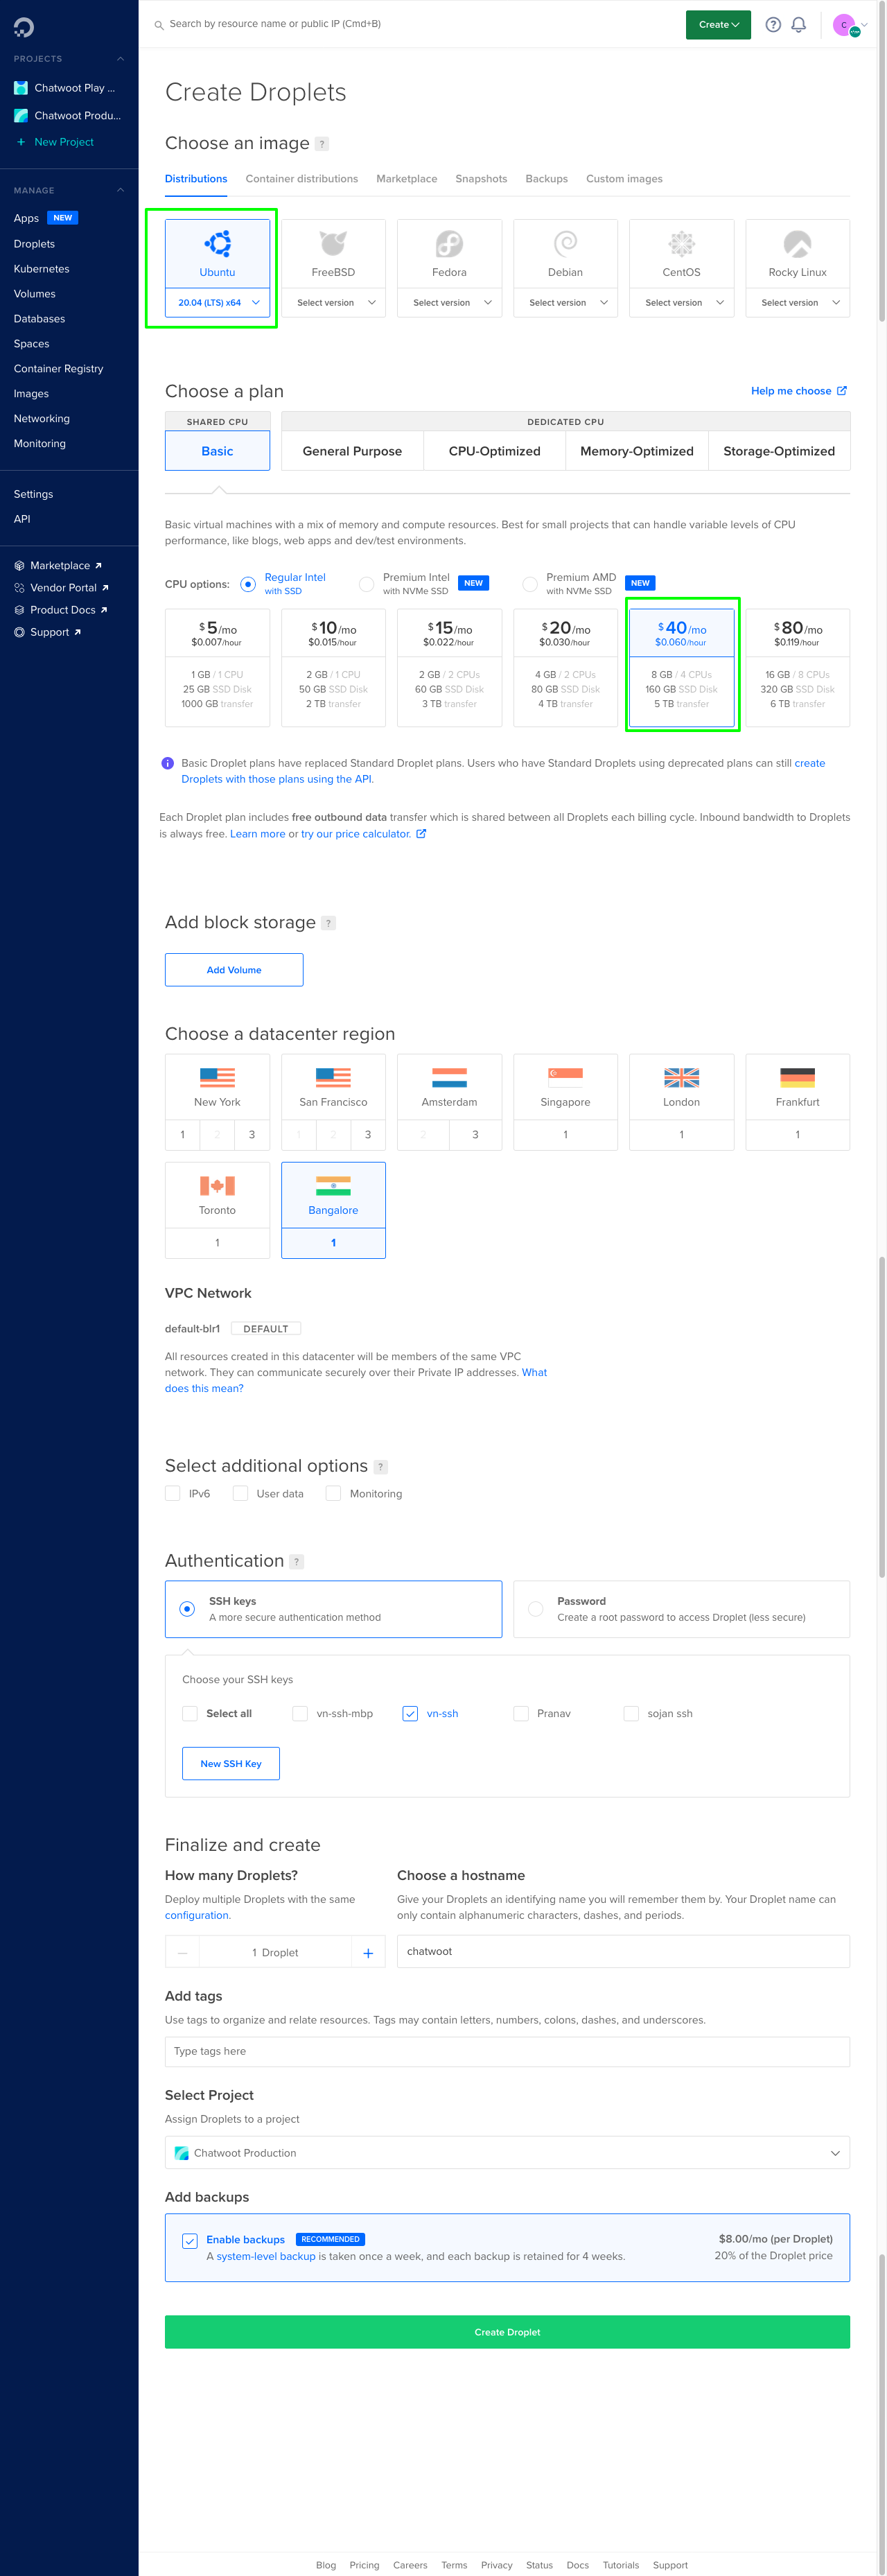
1. Login to DigitalOcean console and choose create droplet.
2. Choose `Ubuntu 20.04` image.
3. Create an instance with a minimum of 4vCPU and 8GB RAM.
4. Make sure to choose the datacenter region you want to deploy.
5. Under authentication, choose your SSH key or create a new one. This is important as you will need
this key to complete the next section.
6. Click create.
 ## Install Chatwoot
1. SSH into the droplet created above.
2. Follow the [Linux VM instructions](/self-hosted/deployment/linux-vm).
3. Woot! Woot! Your Chatwoot Instance is ready and can be accessed at `http://:3000`. Or if you completed the domain setup during the installation, chatwoot should be available at `https://`
## Configure Chatwoot
1. Follow the Chatwoot docs to configure your domain, email and other parameters you need.
Refer to the [Linux VM environment configuration guide](/self-hosted/deployment/linux-vm#configure-the-required-environment-variables).
## Install Chatwoot
1. SSH into the droplet created above.
2. Follow the [Linux VM instructions](/self-hosted/deployment/linux-vm).
3. Woot! Woot! Your Chatwoot Instance is ready and can be accessed at `http://:3000`. Or if you completed the domain setup during the installation, chatwoot should be available at `https://`
## Configure Chatwoot
1. Follow the Chatwoot docs to configure your domain, email and other parameters you need.
Refer to the [Linux VM environment configuration guide](/self-hosted/deployment/linux-vm#configure-the-required-environment-variables).