> ## Documentation Index
> Fetch the complete documentation index at: https://developers.chatwoot.com/llms.txt
> Use this file to discover all available pages before exploring further.
# Cloudfront CDN
> Configure Cloudfront as a CDN for Chatwoot assets
This document helps you to configure Cloudfront as the asset host for Chatwoot. If you have a high traffic website, we would recommend setting up a CDN for Chatwoot.
## Configure a Cloudfront distribution
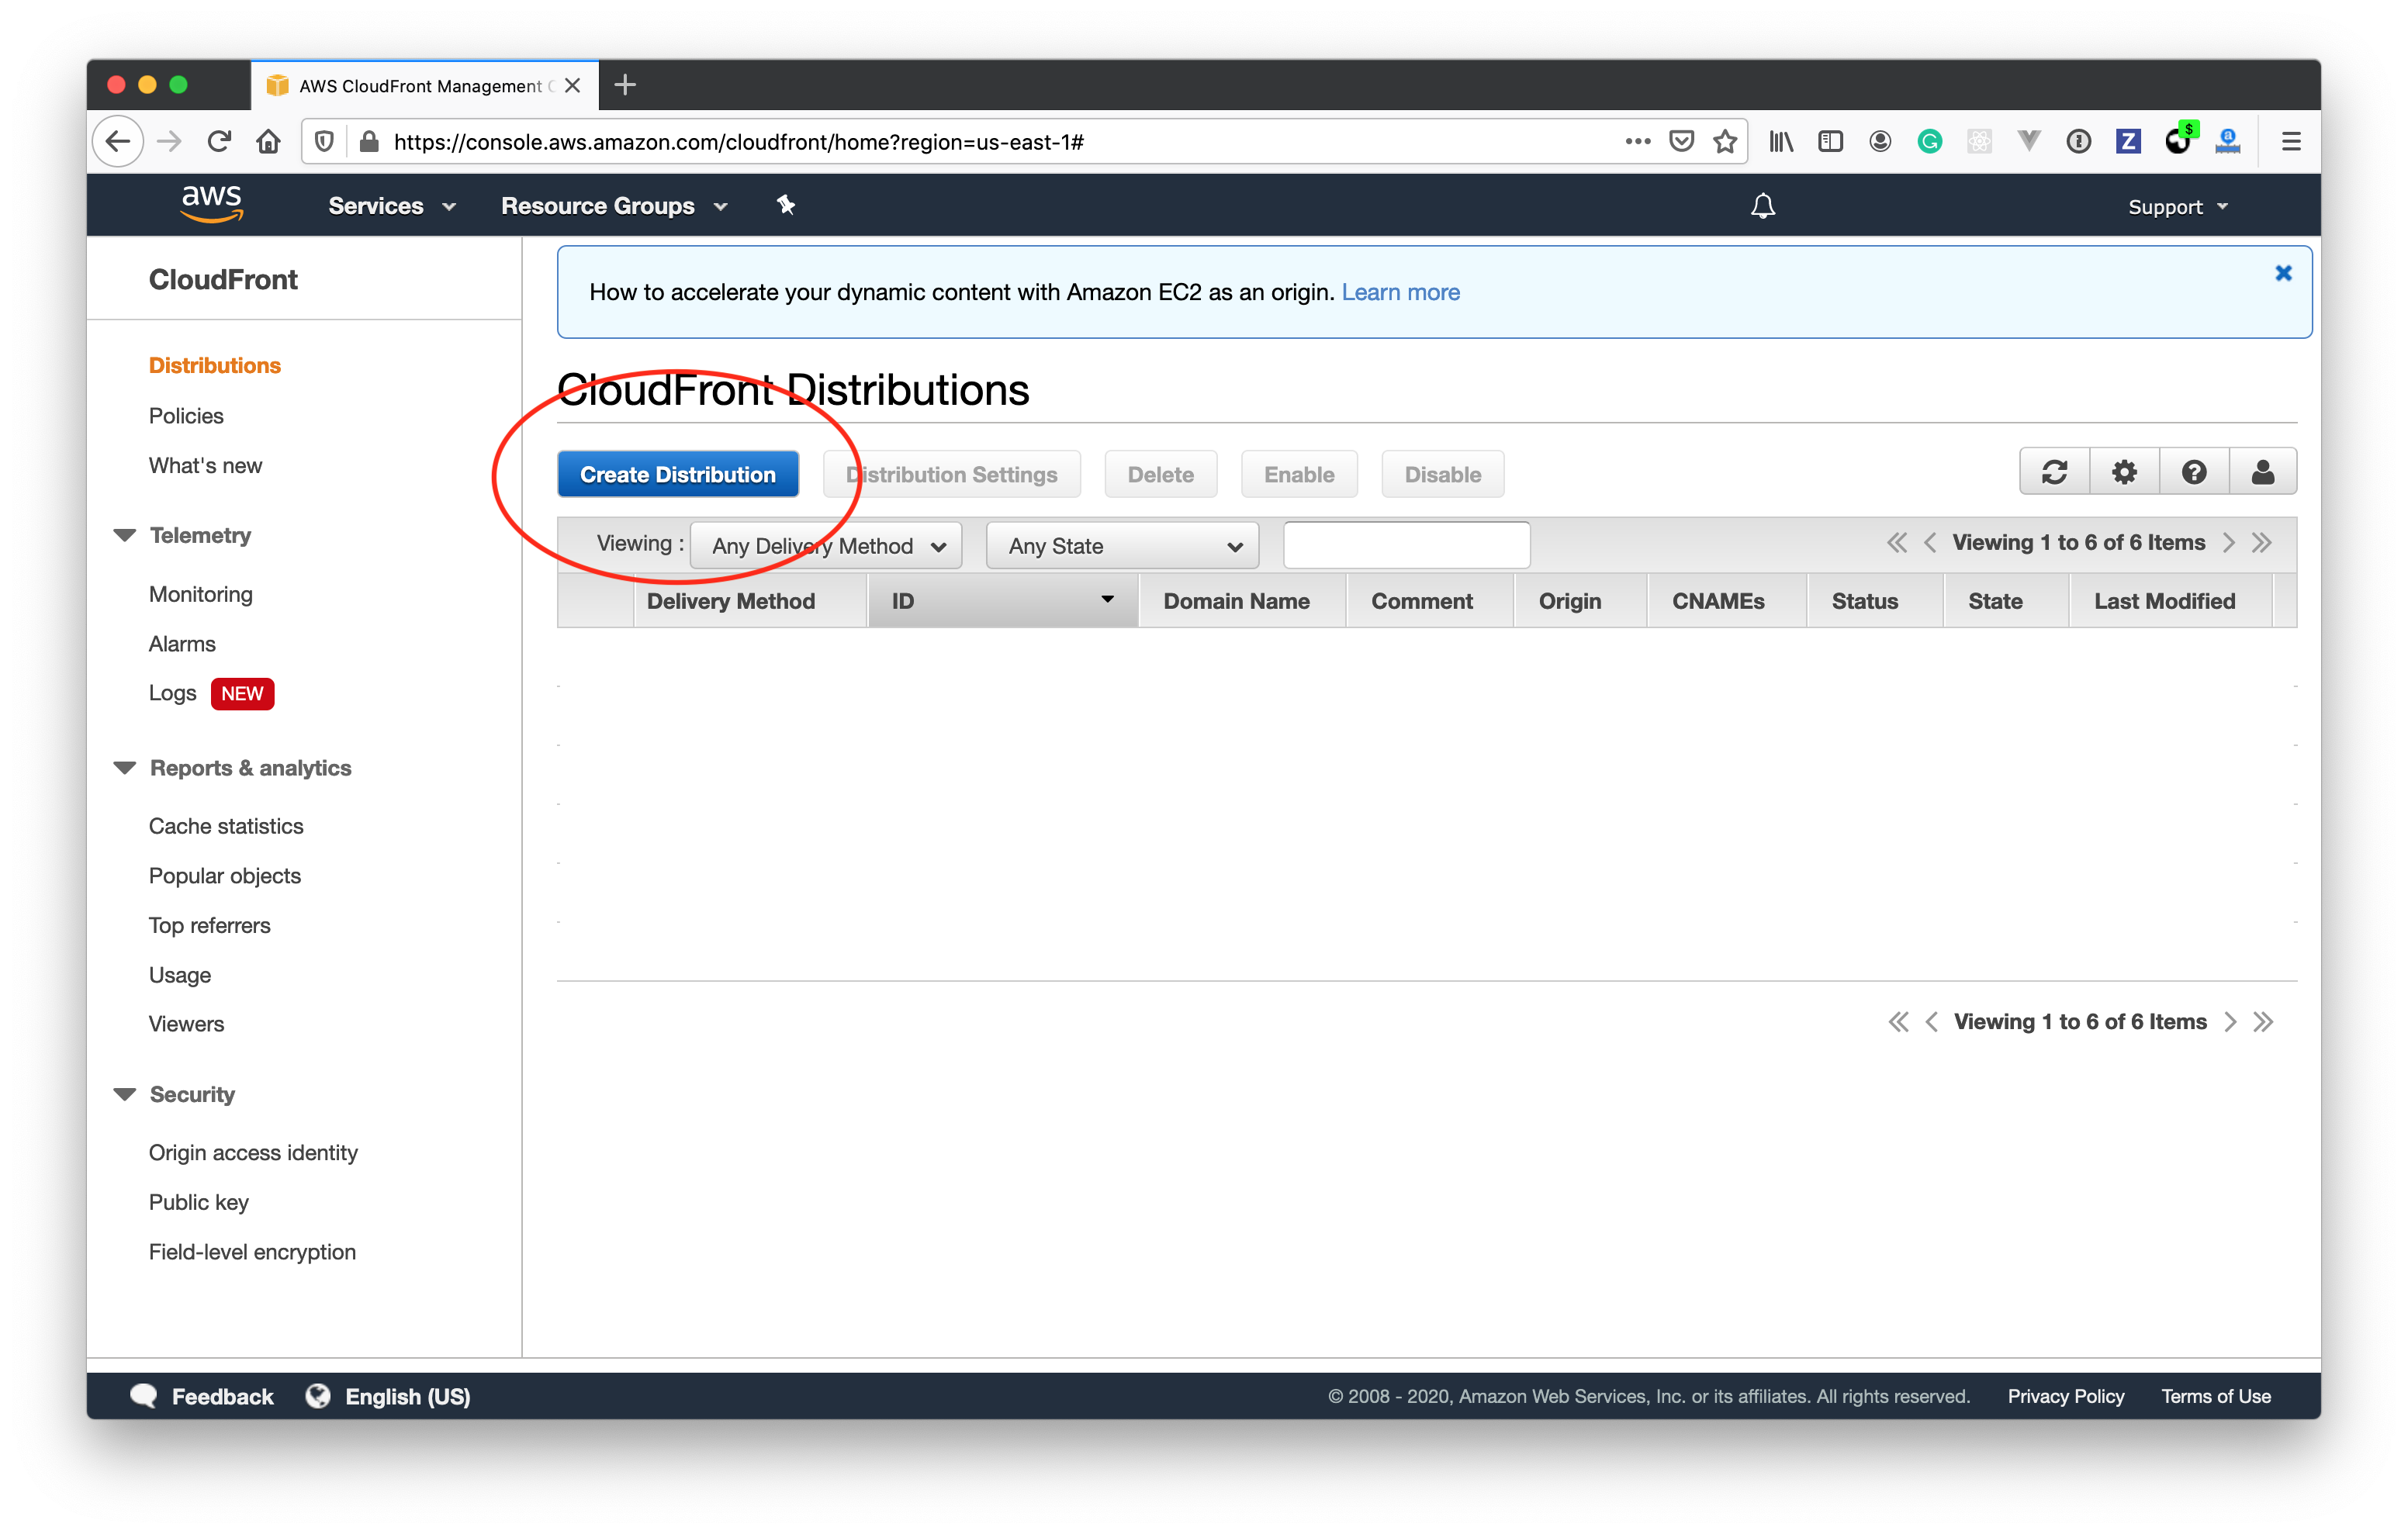
**Step 1**: Create a Cloudfront distribution.
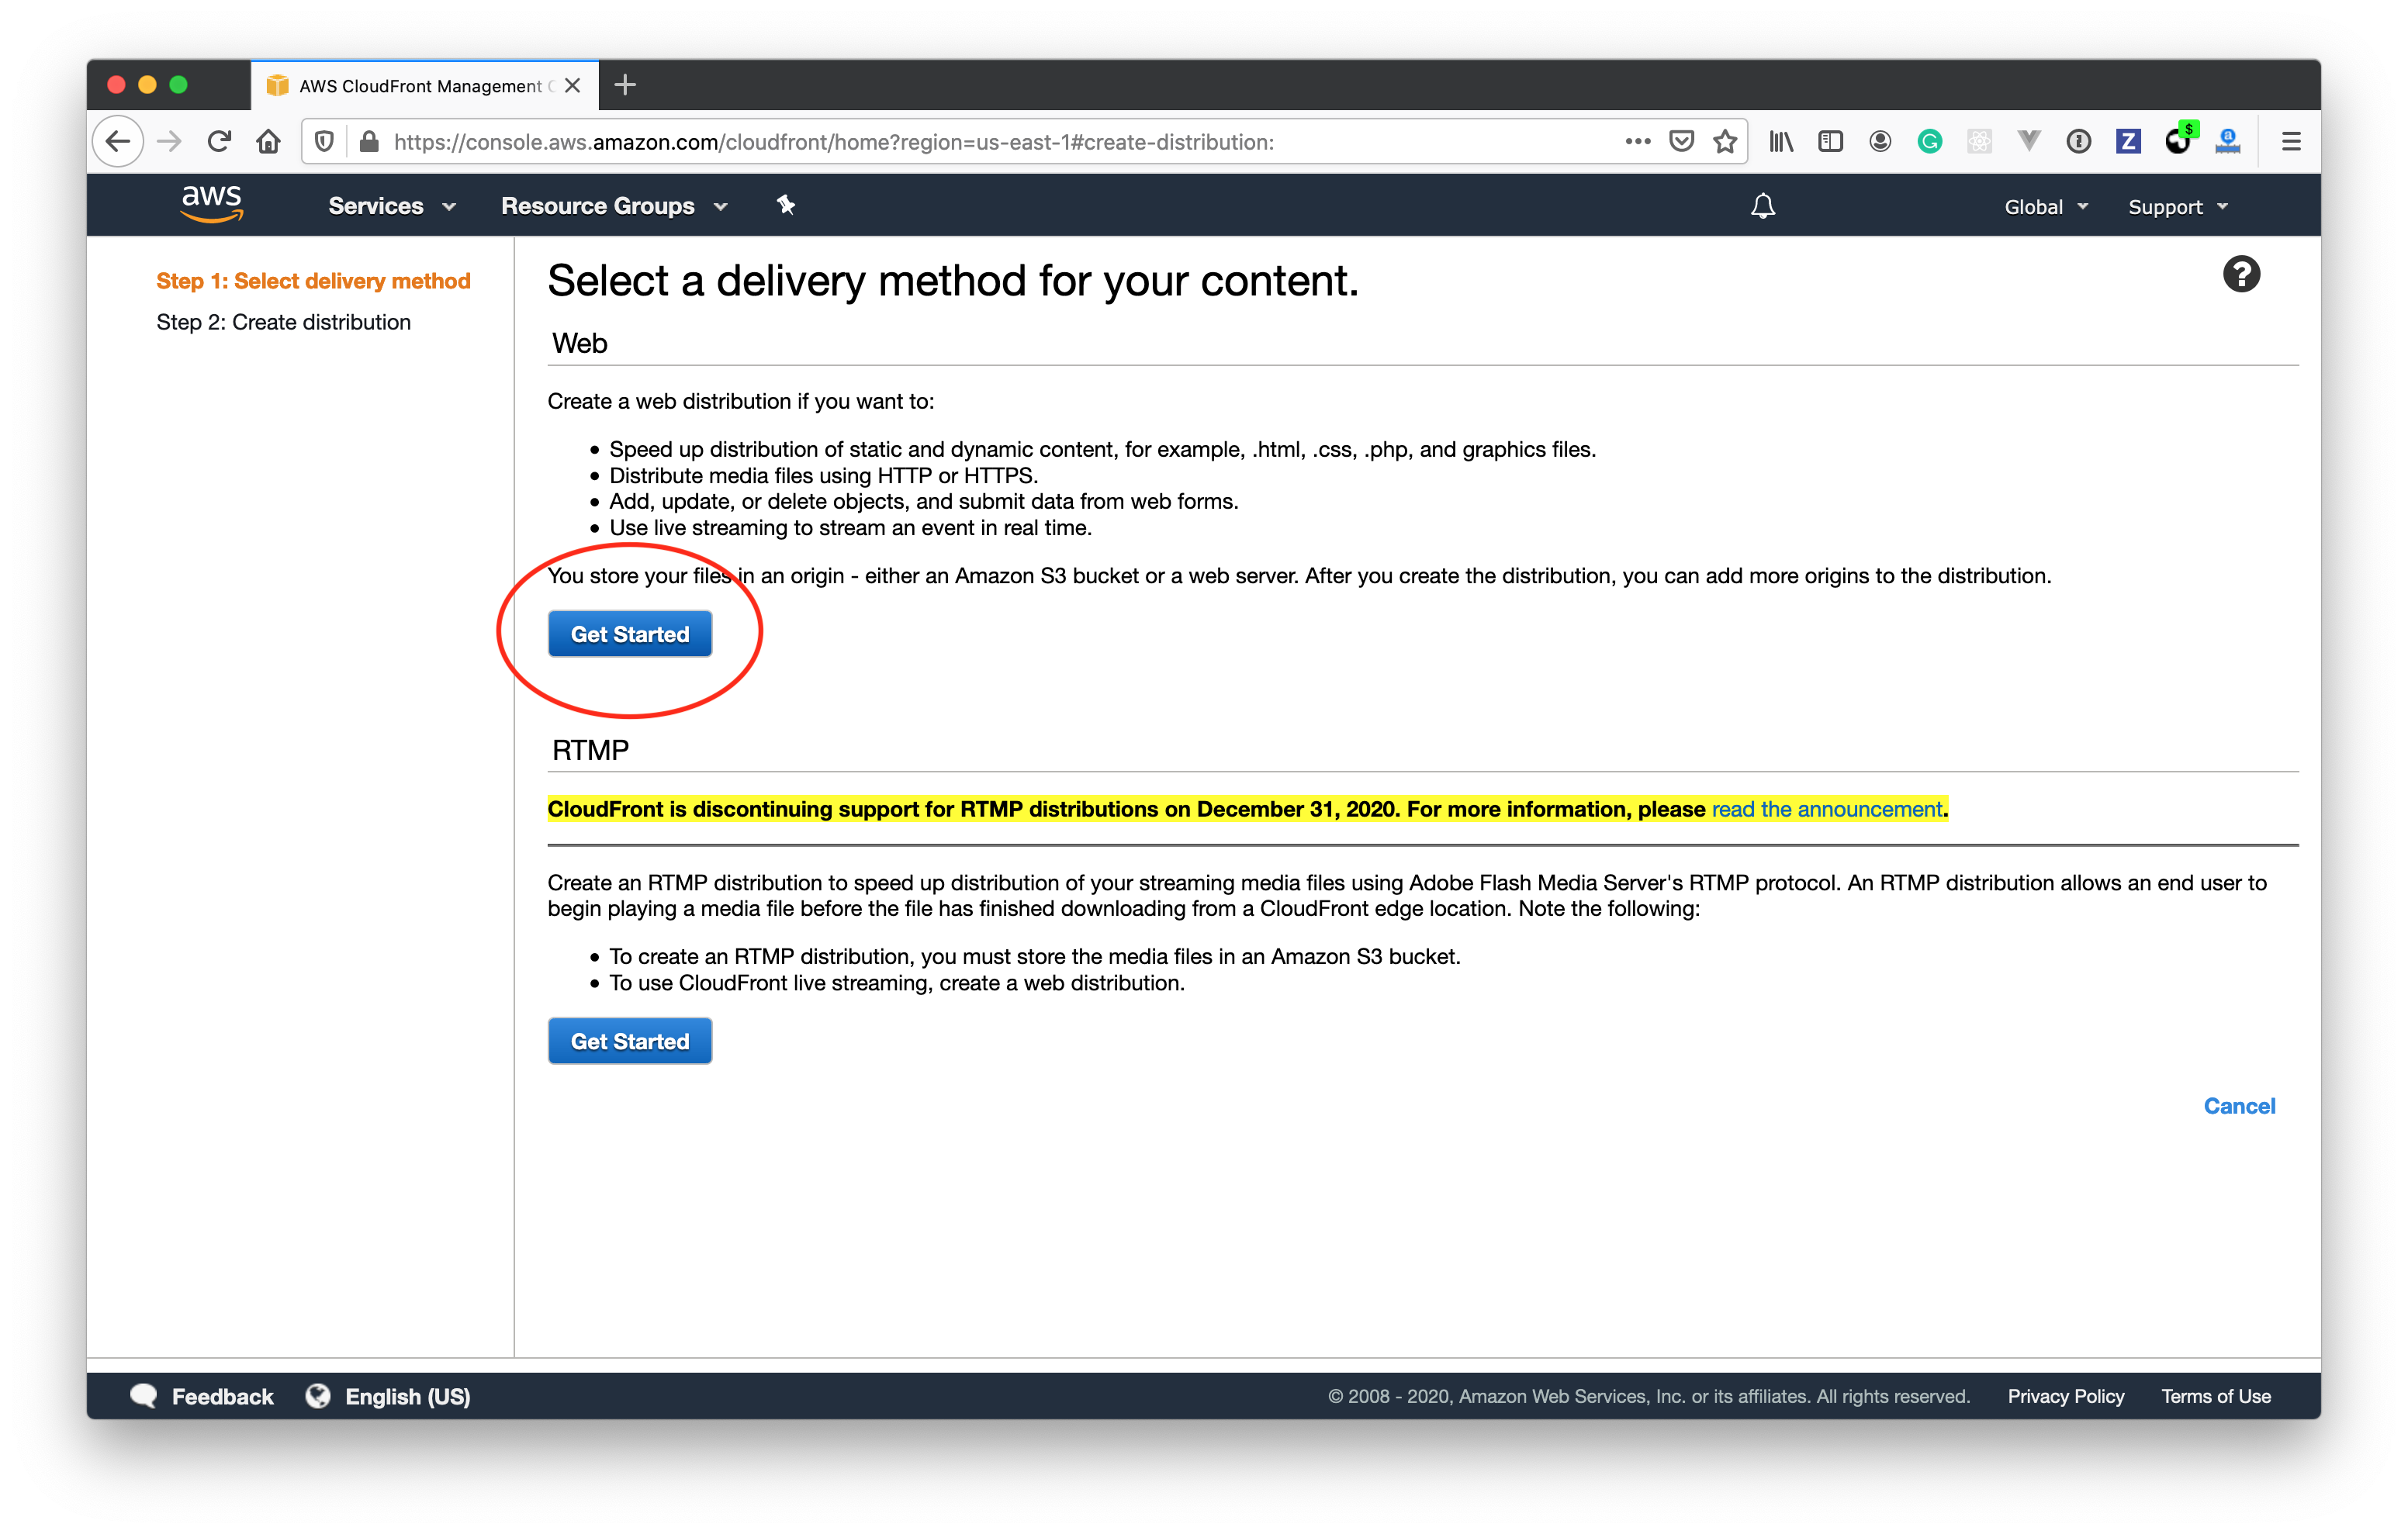
 **Step 2**: Select "Web" as delivery method for your content.
 **Step 3**: Configure the Origin Settings as the following.
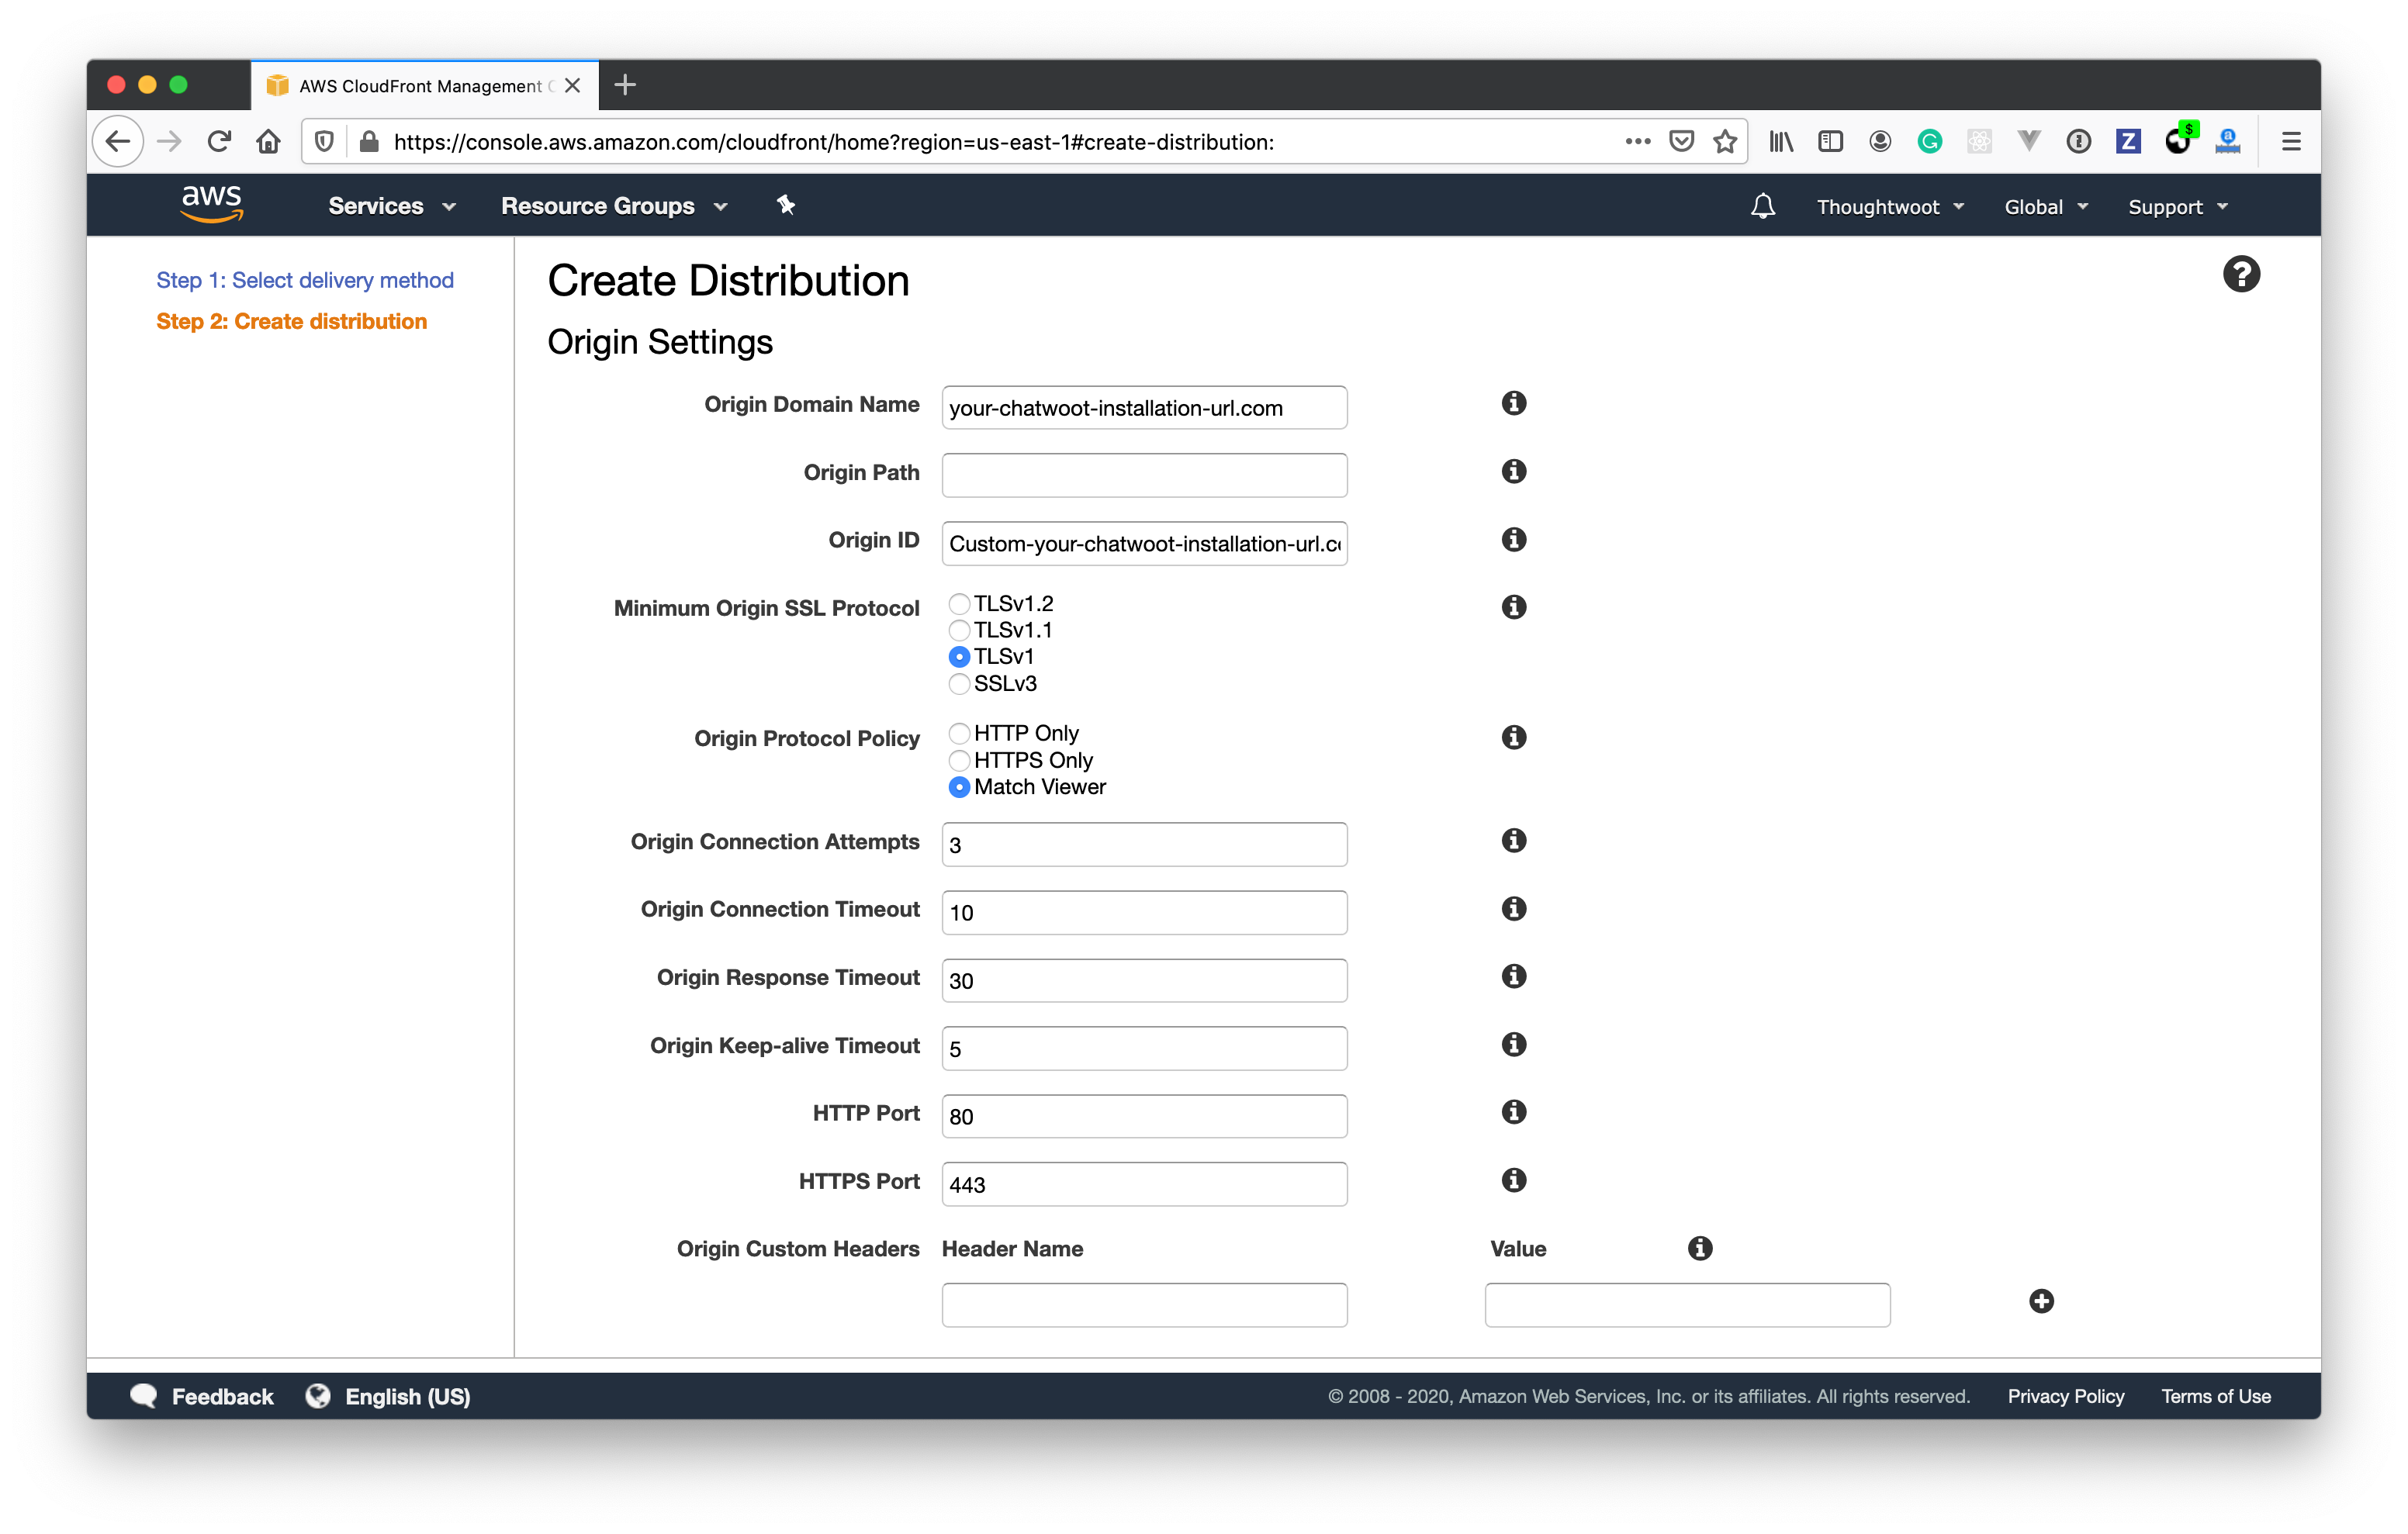 * Provide your Chatwoot Installation URL under Origin Domain Name.
* Select "Origin Protocol Policy" as Match Viewer.
**Step 4**: Configure Cache behaviour.
* Provide your Chatwoot Installation URL under Origin Domain Name.
* Select "Origin Protocol Policy" as Match Viewer.
**Step 4**: Configure Cache behaviour.
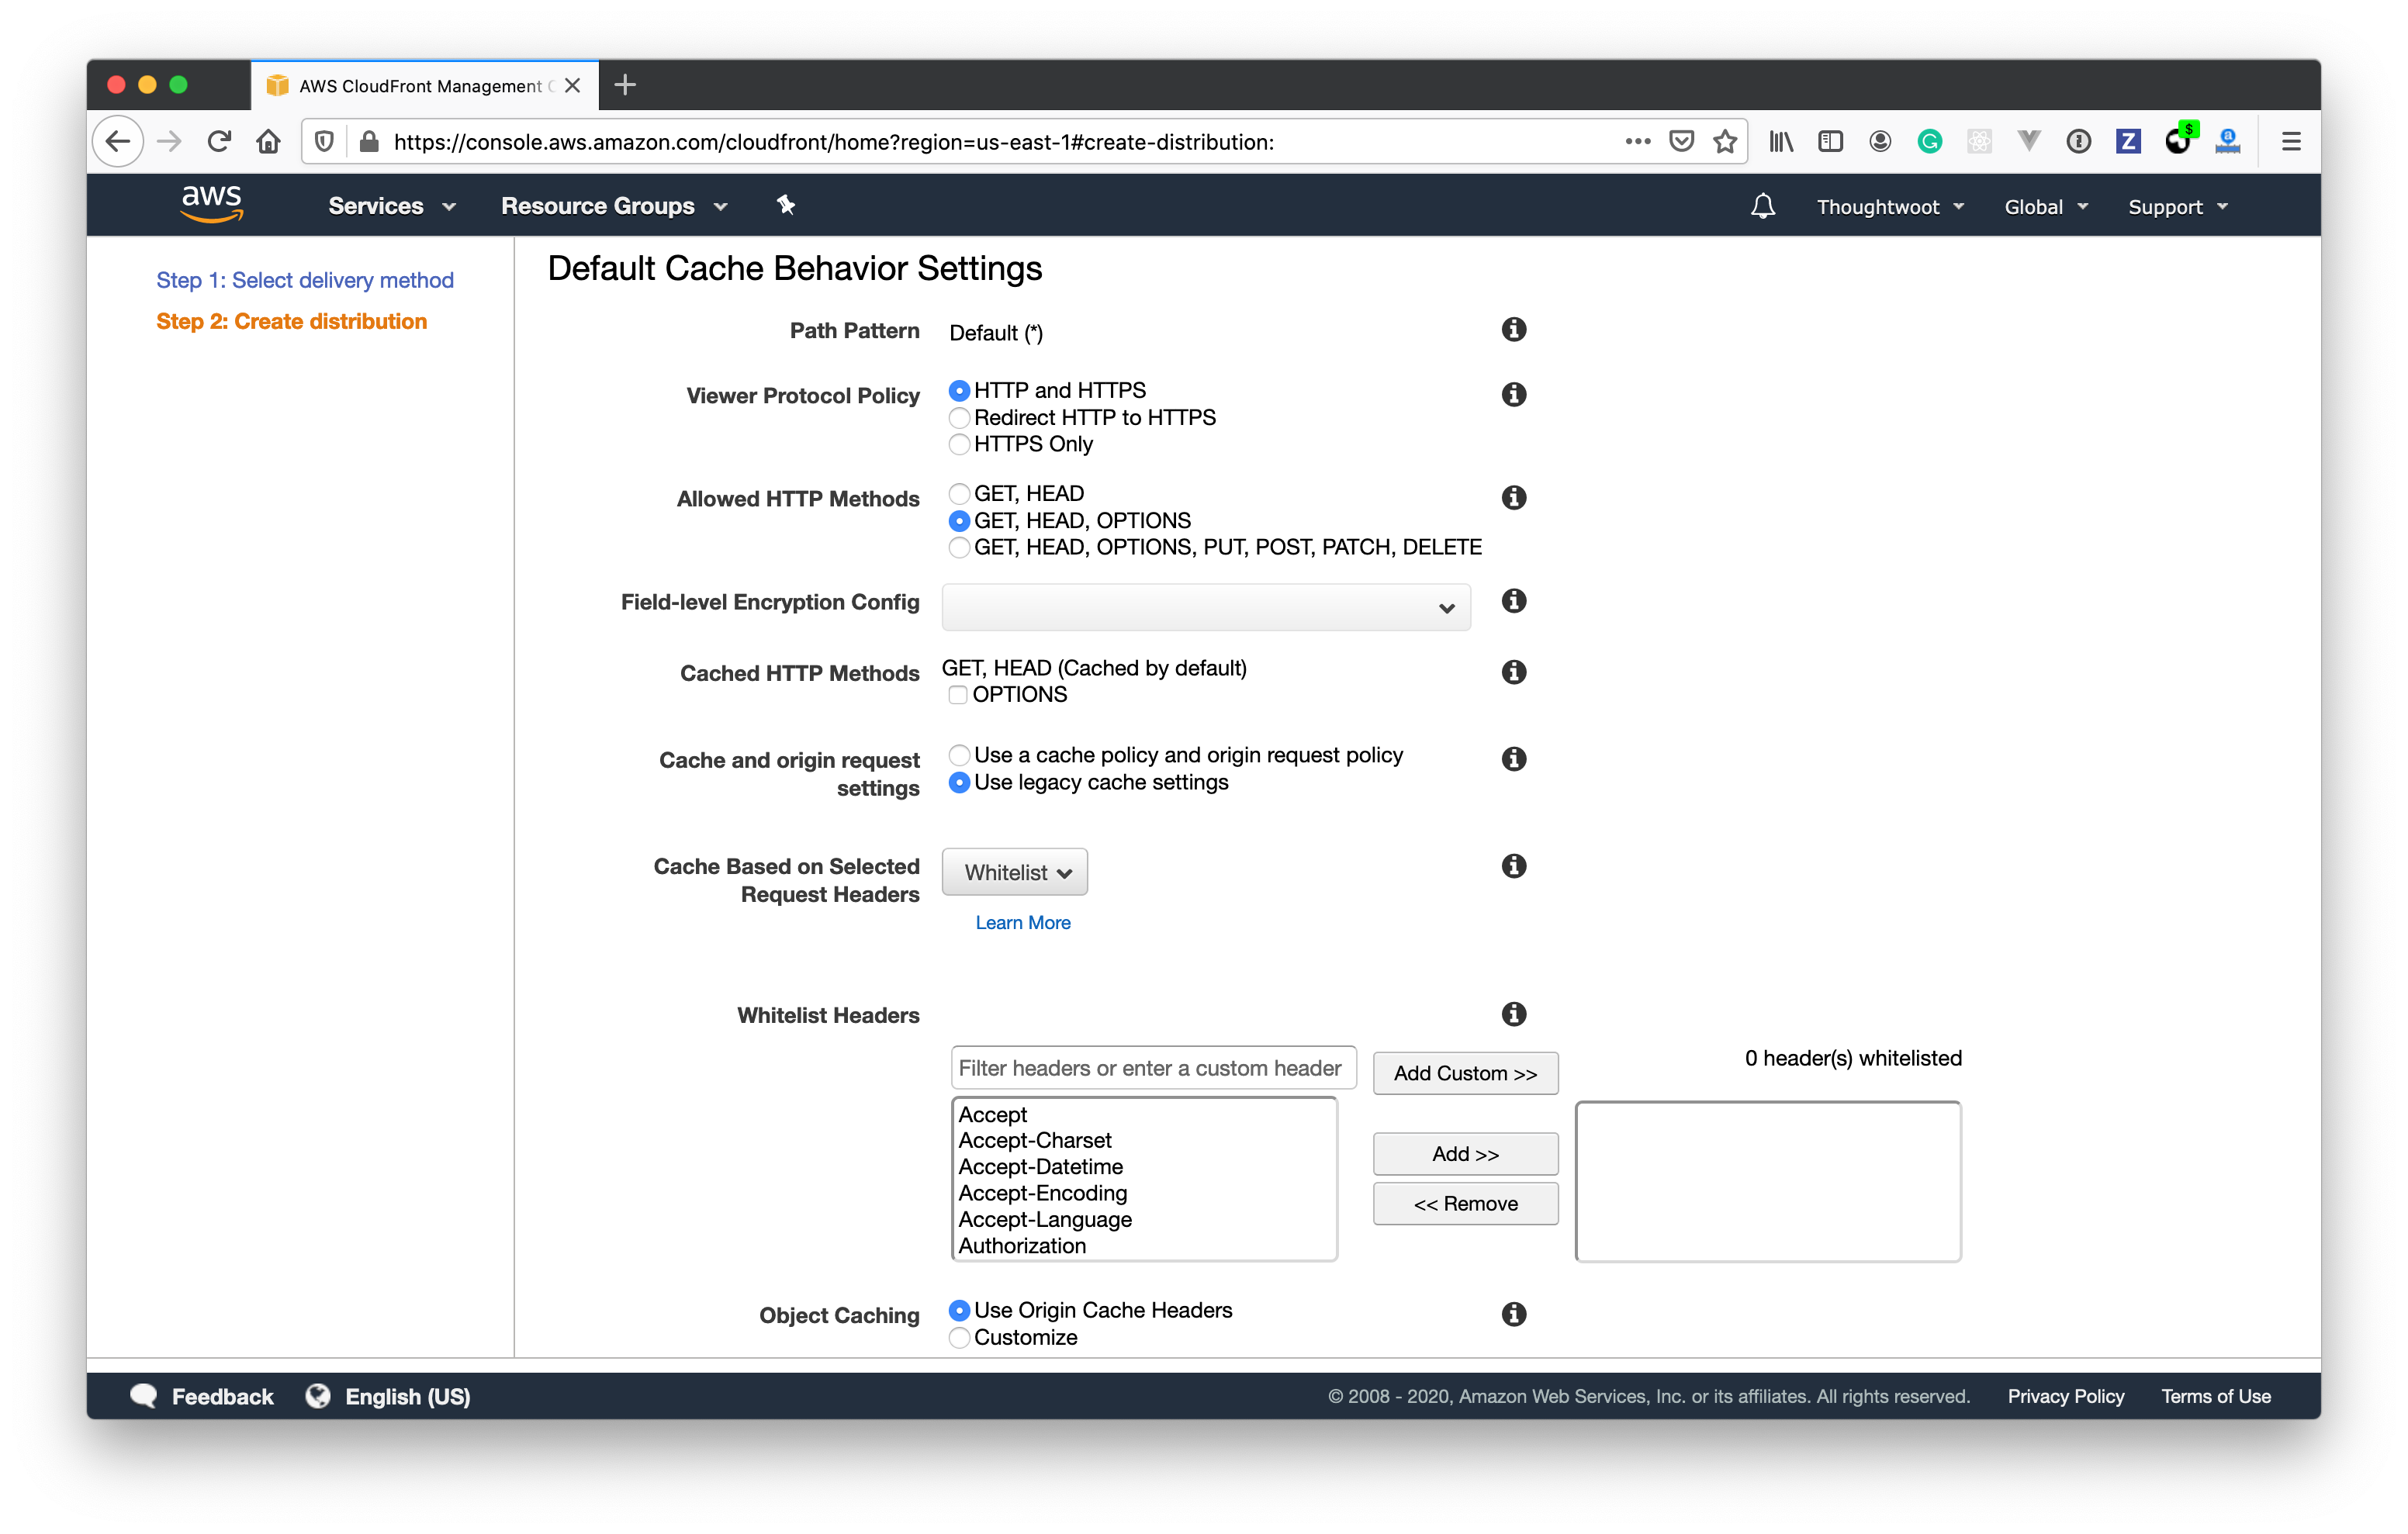 * Configure **Allowed HTTP methods** to use *GET, HEAD, OPTIONS*.
* Configure **Cache and origin request settings** to use *Use legacy cache settings*.
* Select **Whitelist** for *Cache Based on Selected Request Headers*.
* Add the following headers to the **Whitelist Headers**.
* Configure **Allowed HTTP methods** to use *GET, HEAD, OPTIONS*.
* Configure **Cache and origin request settings** to use *Use legacy cache settings*.
* Select **Whitelist** for *Cache Based on Selected Request Headers*.
* Add the following headers to the **Whitelist Headers**.
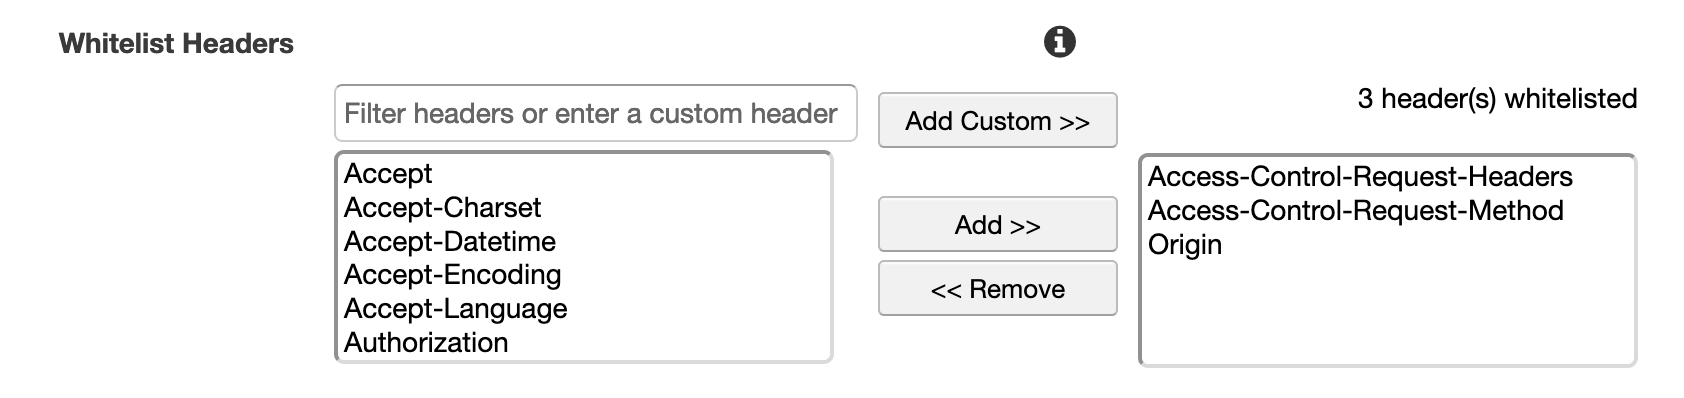 * **Access-Control-Request-Headers**
* **Access-Control-Request-Method**
* **Origin**
* Set the **Response headers policy** to **CORS-With-Preflight**
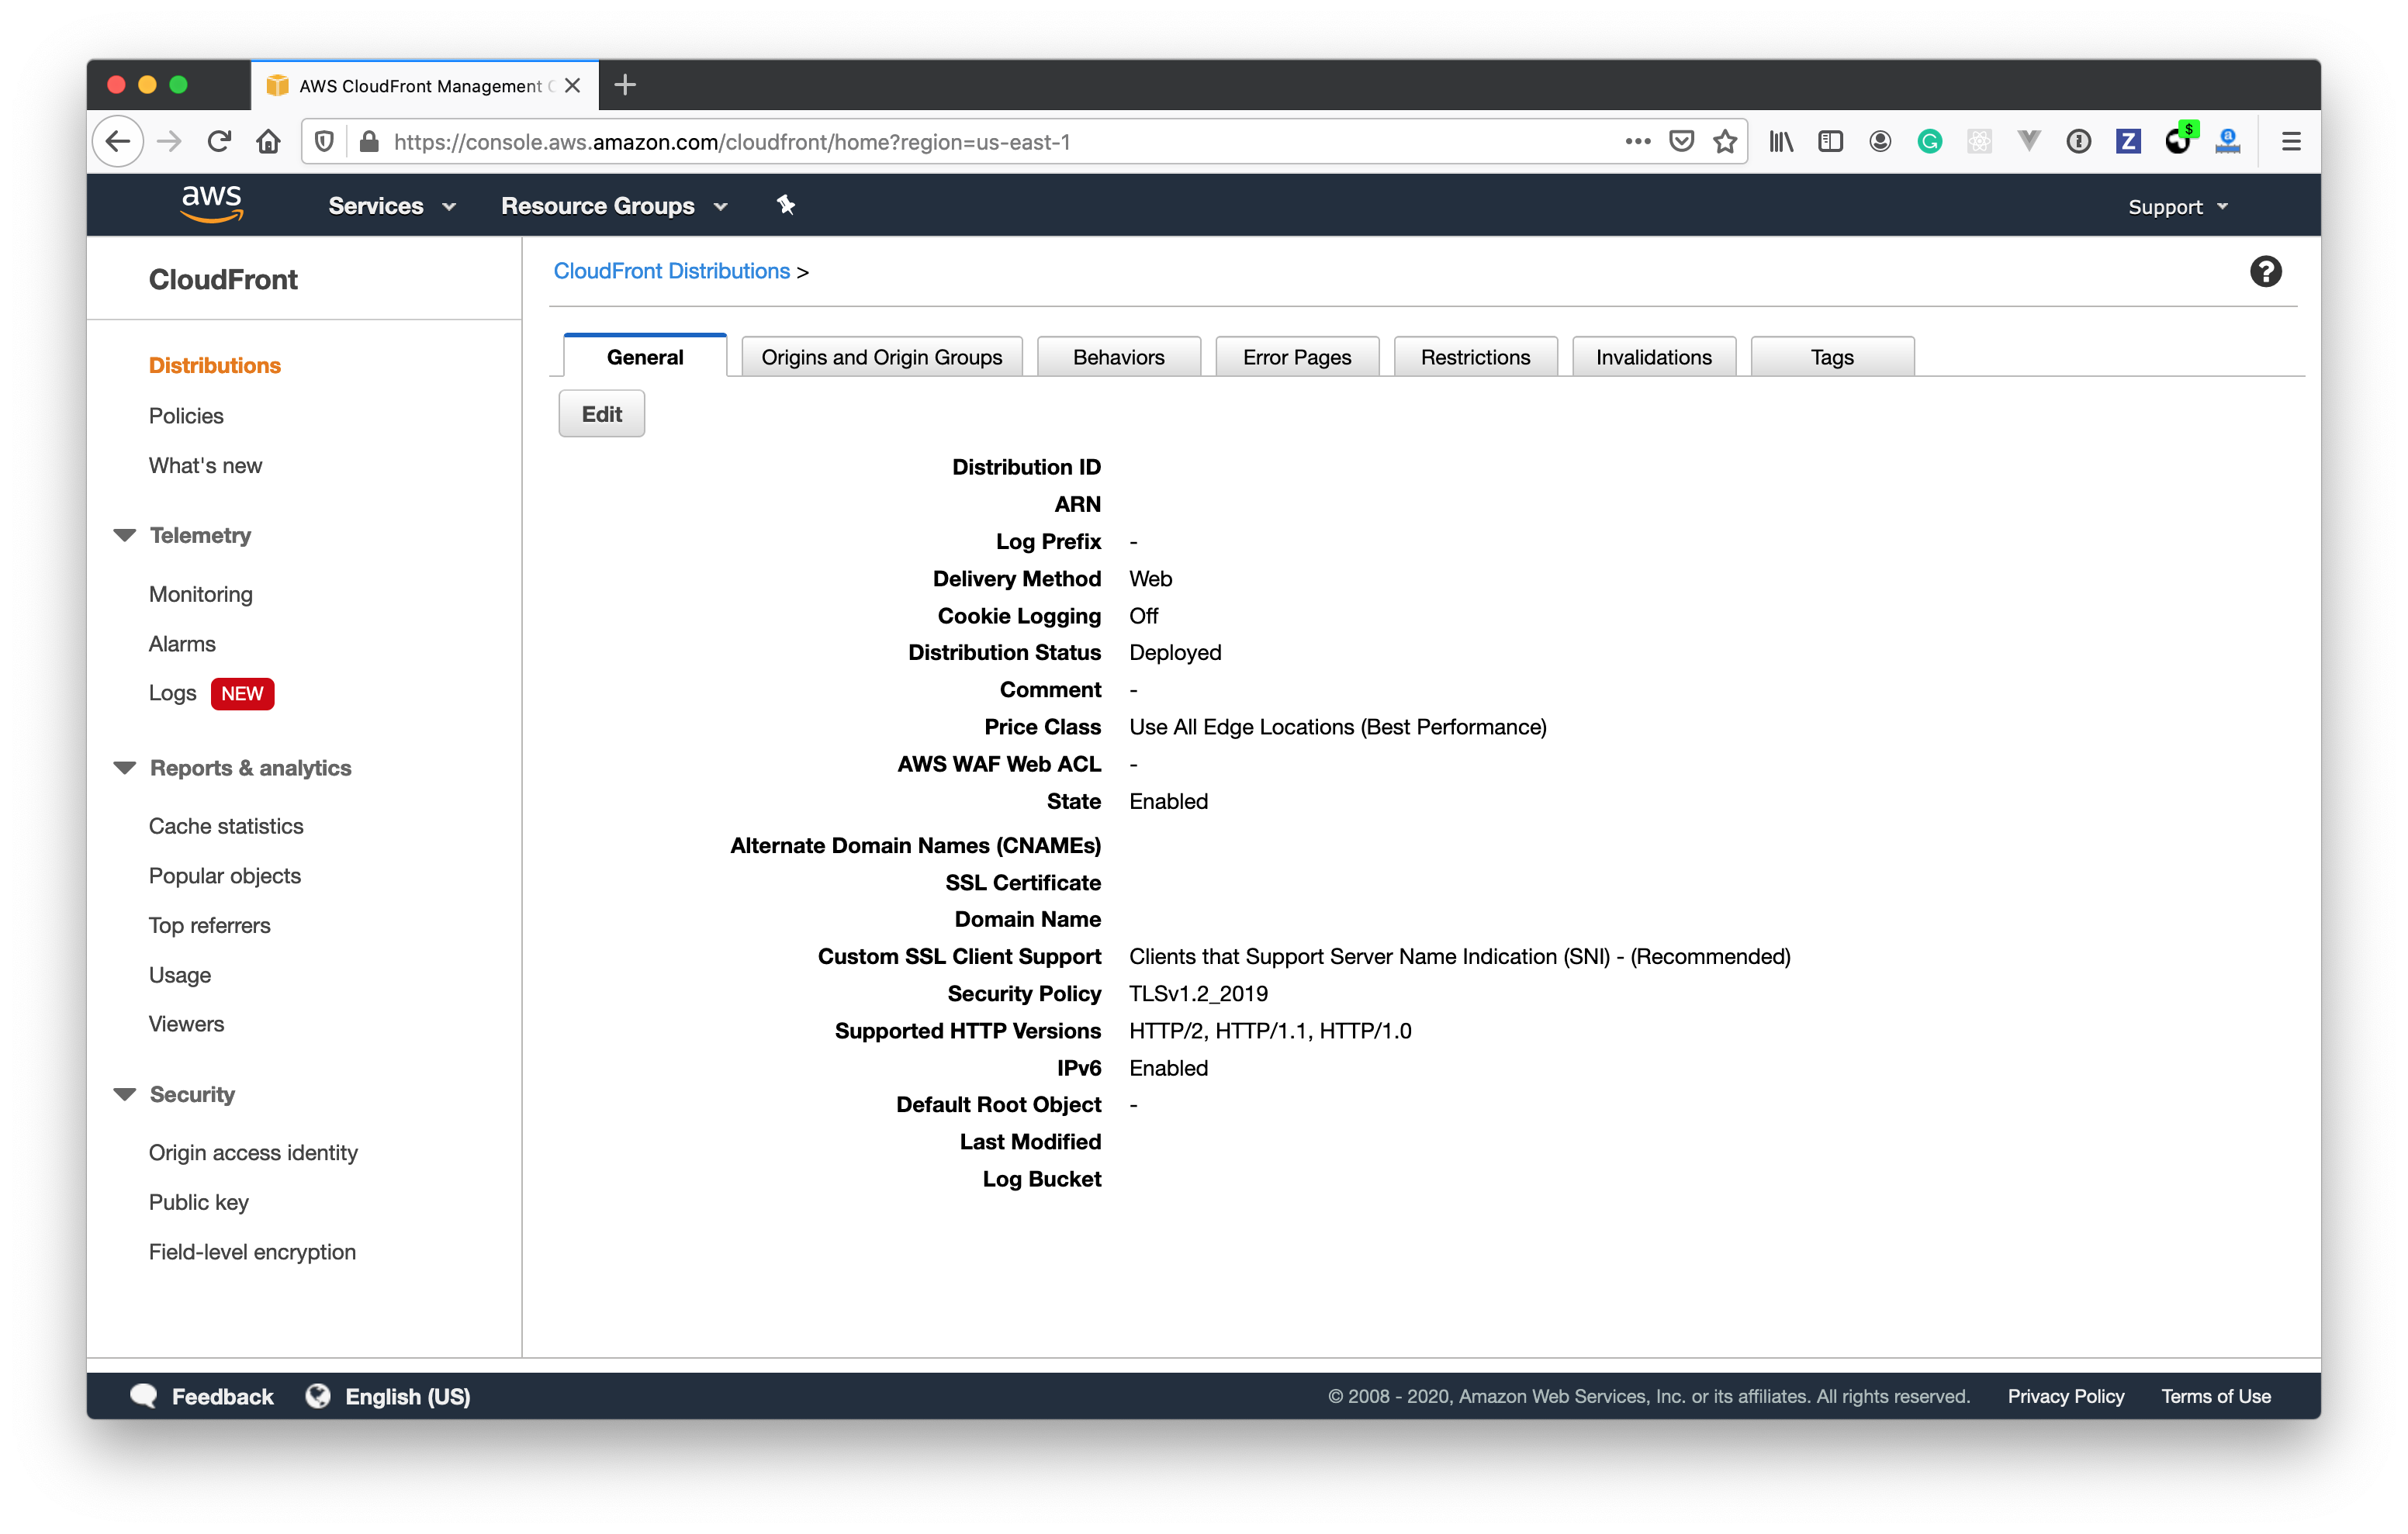
**Step 5**: Click on **Create Distribution**. You will be able to see the distribution as shown below. Use the **Domain name** listed in the details as the **ASSET\_CDN\_HOST** in Chatwoot.
* **Access-Control-Request-Headers**
* **Access-Control-Request-Method**
* **Origin**
* Set the **Response headers policy** to **CORS-With-Preflight**
**Step 5**: Click on **Create Distribution**. You will be able to see the distribution as shown below. Use the **Domain name** listed in the details as the **ASSET\_CDN\_HOST** in Chatwoot.
 ## Add ASSET\_CDN\_HOST in Chatwoot
Your Cloudfront URL will be of the format `.cloudfront.net`.
Set
```bash theme={null}
ASSET_CDN_HOST=.cloudfront.net
```
in the environment variables.
## Benefits of Using CDN
Using a CDN provides several benefits for your Chatwoot installation:
1. **Faster Asset Loading**: Assets are served from edge locations closer to users
2. **Reduced Server Load**: Static assets are served from CDN, reducing load on your application server
3. **Better User Experience**: Faster page load times improve user experience
4. **Global Availability**: Assets are cached globally for users worldwide
5. **Bandwidth Savings**: Reduces bandwidth usage on your origin server
## Troubleshooting
### CORS Issues
If you encounter CORS issues after setting up CloudFront:
1. Ensure the CORS headers are properly configured in CloudFront
2. Verify that your `CORS_ORIGINS` environment variable includes your CDN domain:
```bash theme={null}
CORS_ORIGINS=https://yourdomain.com,https://d1234567890.cloudfront.net
```
### Cache Invalidation
To invalidate CloudFront cache after updating assets:
1. Go to CloudFront console
2. Select your distribution
3. Create an invalidation for `/*` to clear all cached assets
### SSL Certificate
For custom domain names with CloudFront:
1. Request an SSL certificate in AWS Certificate Manager (ACM)
2. Configure the certificate in your CloudFront distribution
3. Update your DNS to point to the CloudFront distribution
SSL certificates for CloudFront must be requested in the US East (N. Virginia) region regardless of where your distribution is located.
## Add ASSET\_CDN\_HOST in Chatwoot
Your Cloudfront URL will be of the format `.cloudfront.net`.
Set
```bash theme={null}
ASSET_CDN_HOST=.cloudfront.net
```
in the environment variables.
## Benefits of Using CDN
Using a CDN provides several benefits for your Chatwoot installation:
1. **Faster Asset Loading**: Assets are served from edge locations closer to users
2. **Reduced Server Load**: Static assets are served from CDN, reducing load on your application server
3. **Better User Experience**: Faster page load times improve user experience
4. **Global Availability**: Assets are cached globally for users worldwide
5. **Bandwidth Savings**: Reduces bandwidth usage on your origin server
## Troubleshooting
### CORS Issues
If you encounter CORS issues after setting up CloudFront:
1. Ensure the CORS headers are properly configured in CloudFront
2. Verify that your `CORS_ORIGINS` environment variable includes your CDN domain:
```bash theme={null}
CORS_ORIGINS=https://yourdomain.com,https://d1234567890.cloudfront.net
```
### Cache Invalidation
To invalidate CloudFront cache after updating assets:
1. Go to CloudFront console
2. Select your distribution
3. Create an invalidation for `/*` to clear all cached assets
### SSL Certificate
For custom domain names with CloudFront:
1. Request an SSL certificate in AWS Certificate Manager (ACM)
2. Configure the certificate in your CloudFront distribution
3. Update your DNS to point to the CloudFront distribution
SSL certificates for CloudFront must be requested in the US East (N. Virginia) region regardless of where your distribution is located.