Configure a Cloudfront distribution
Step 1: Create a Cloudfront distribution.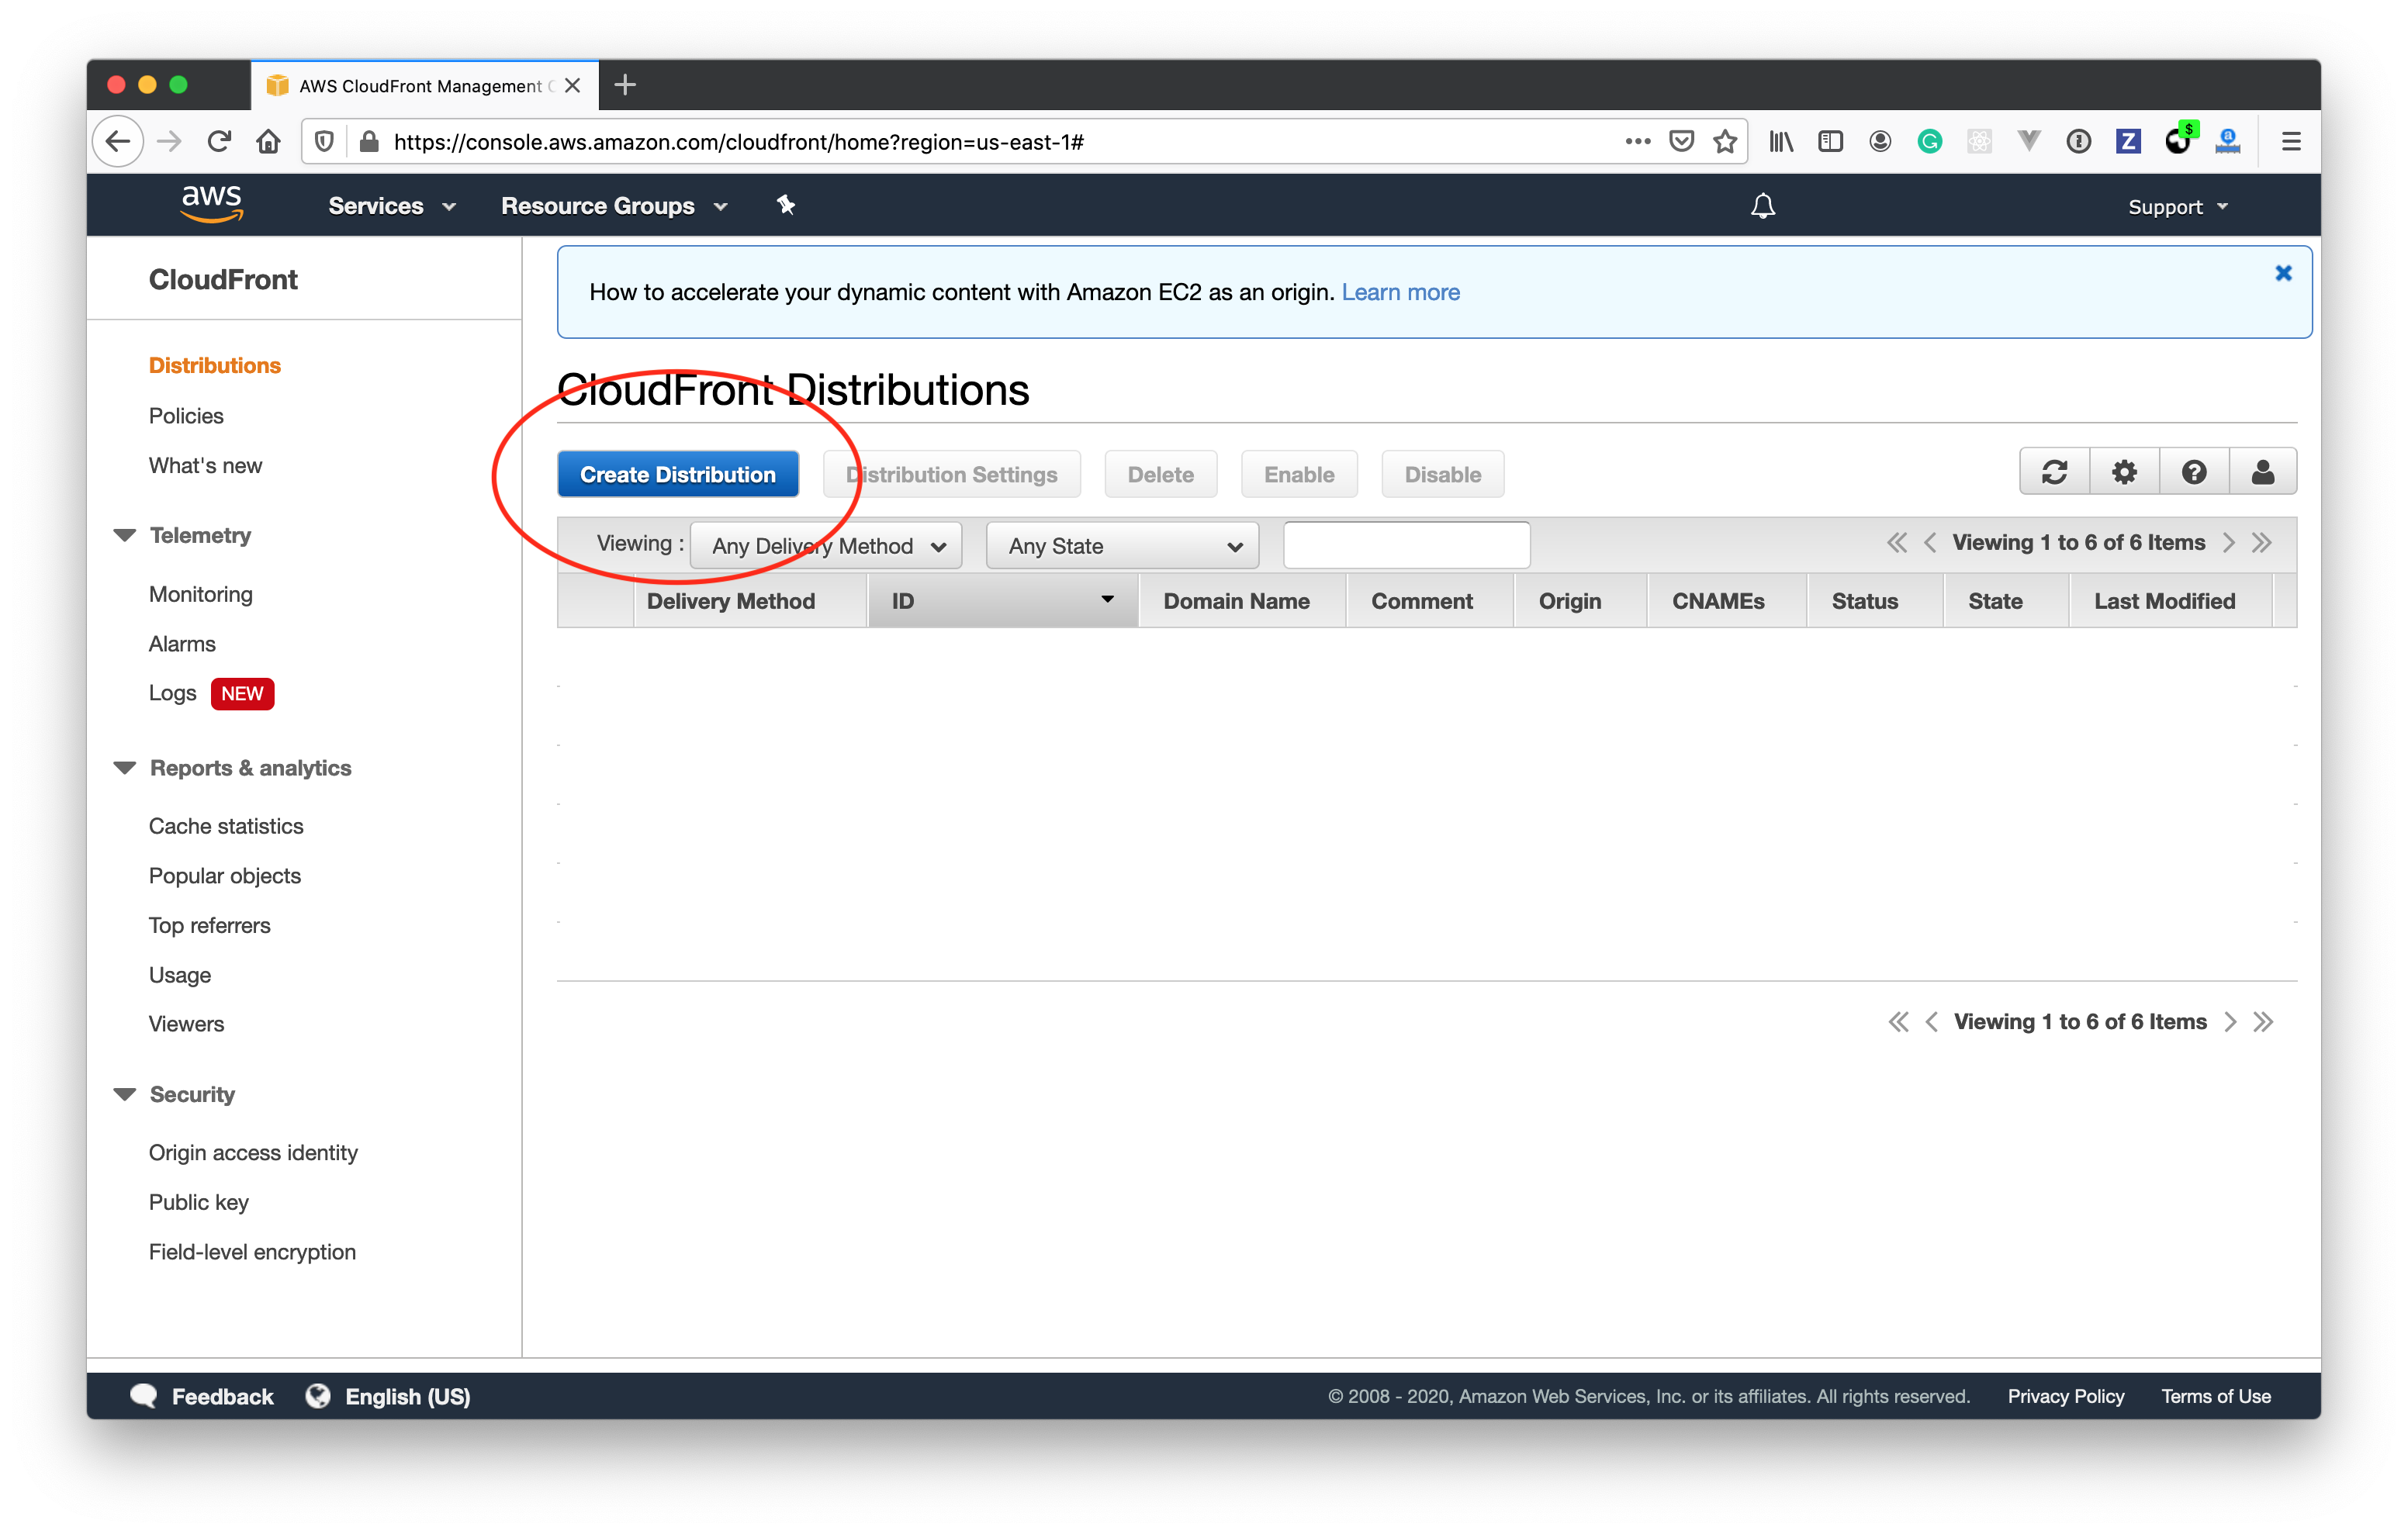

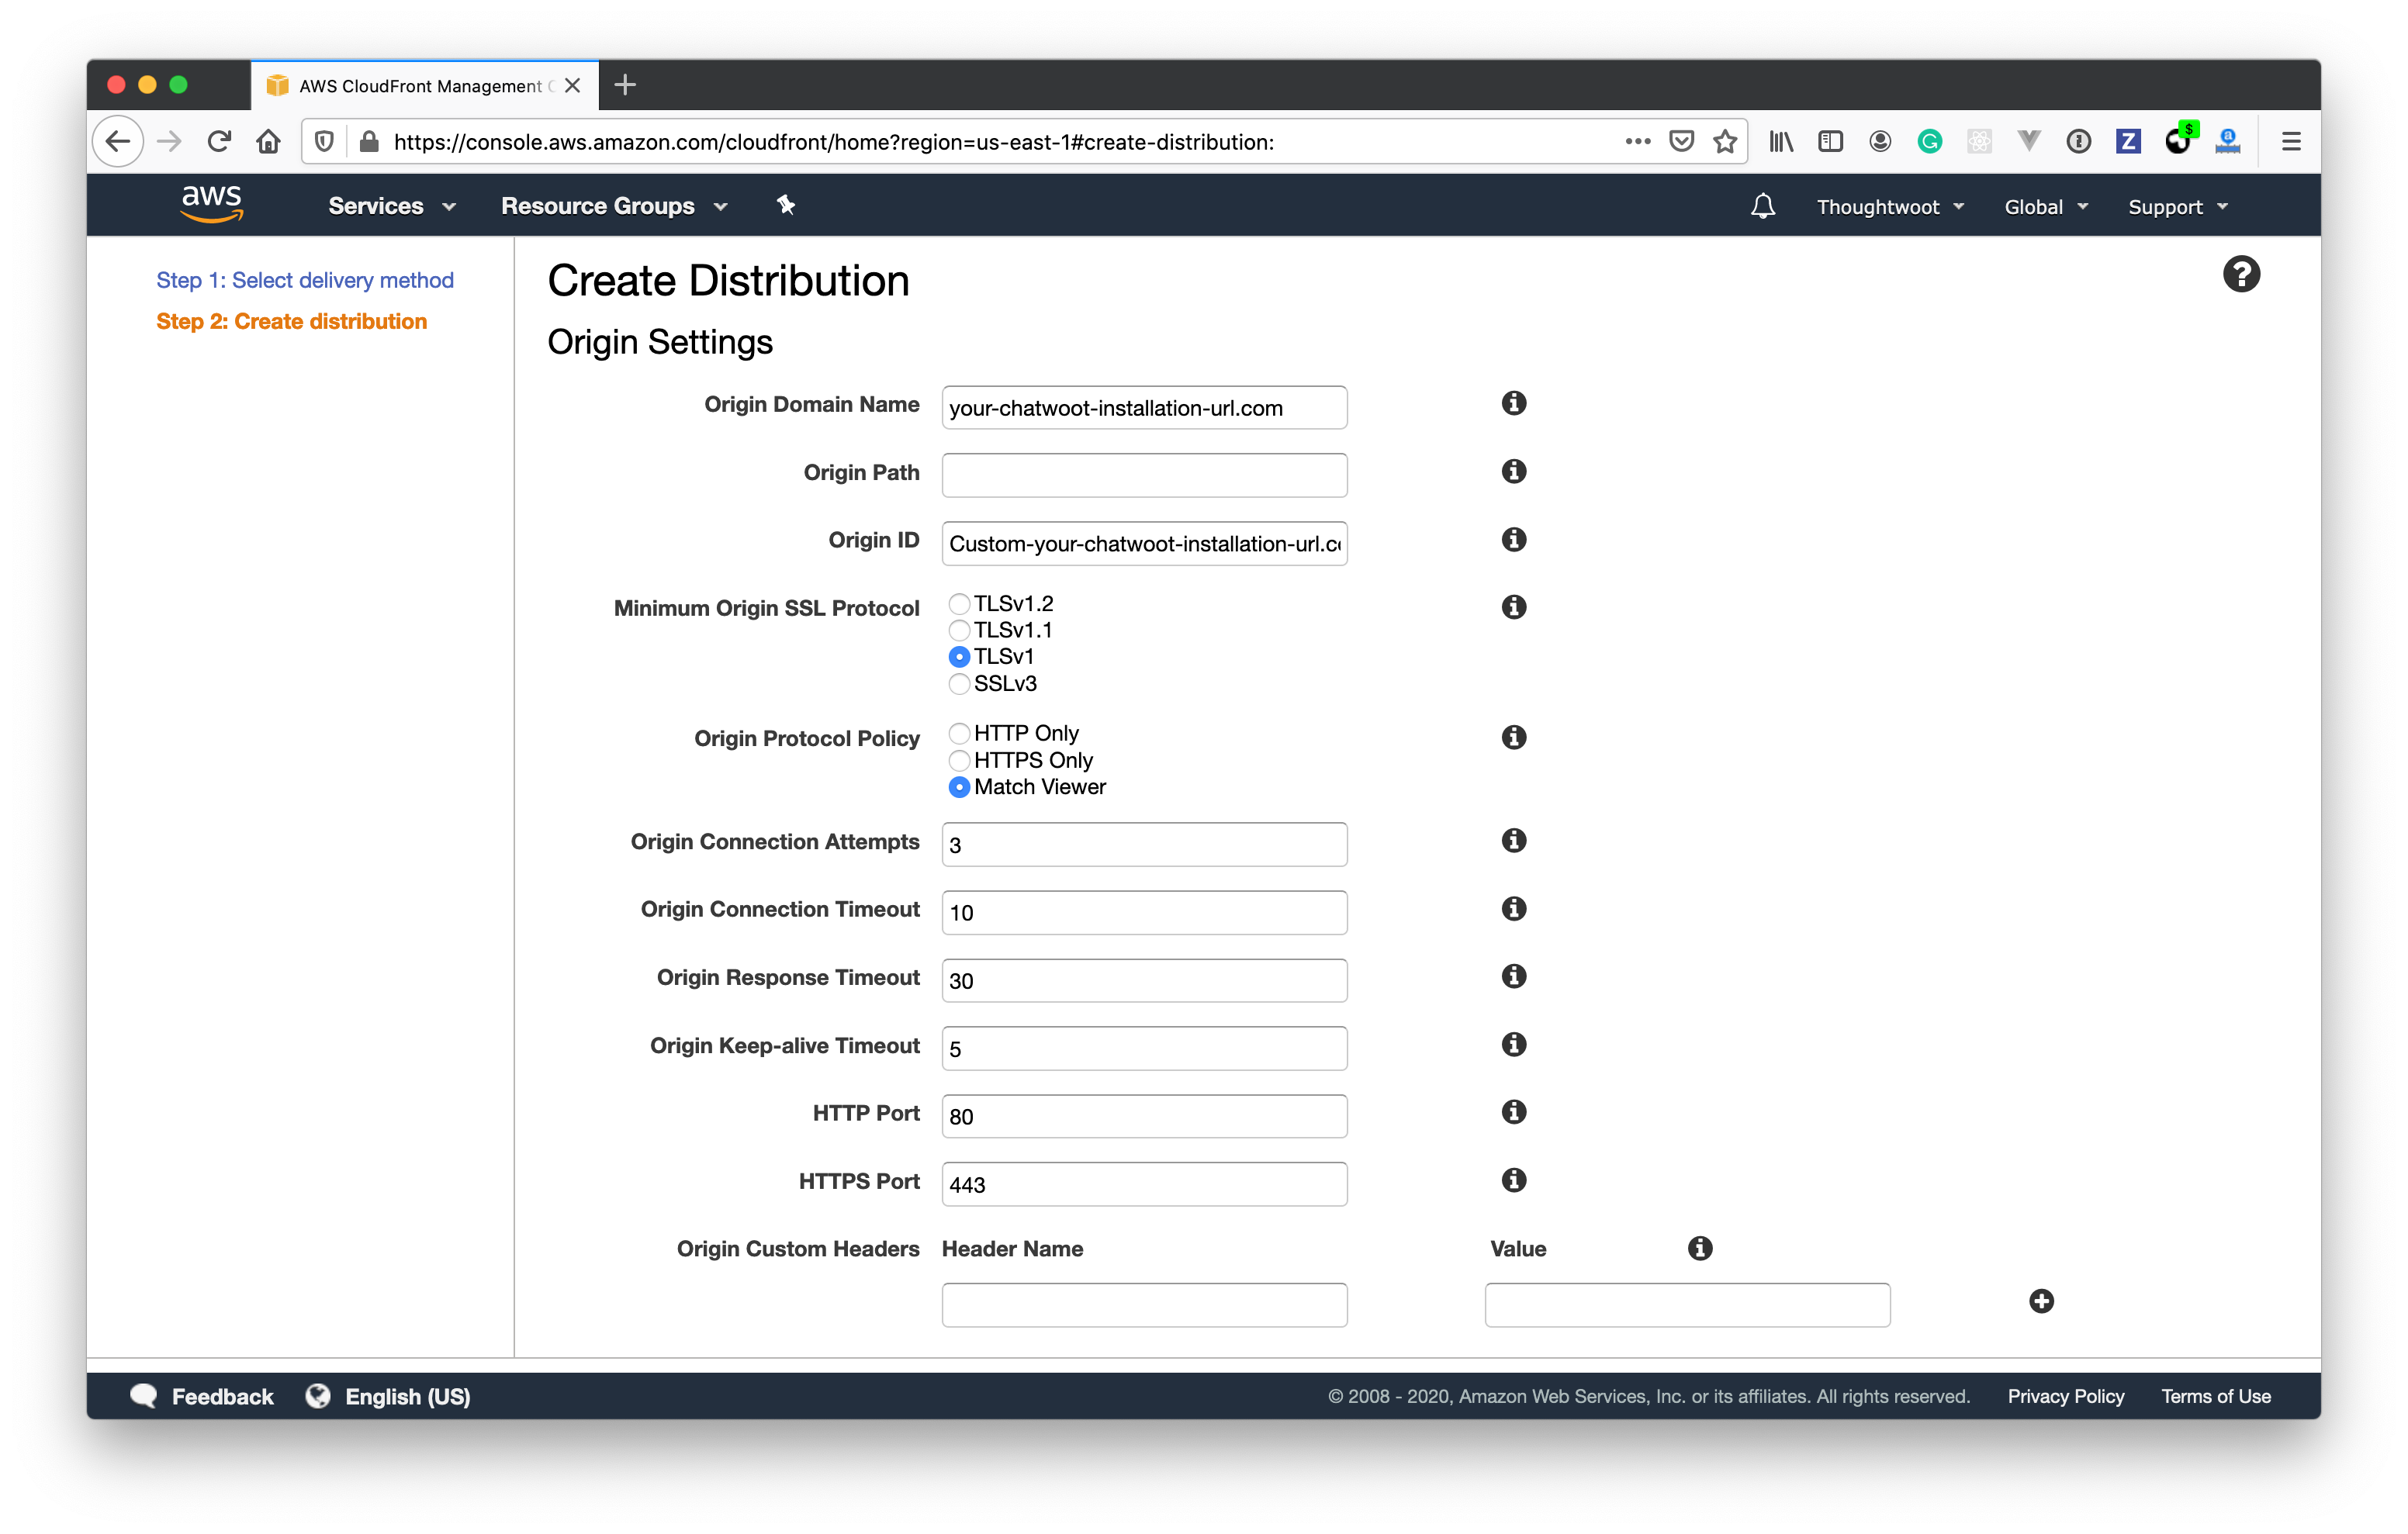
- Provide your Chatwoot Installation URL under Origin Domain Name.
- Select “Origin Protocol Policy” as Match Viewer.
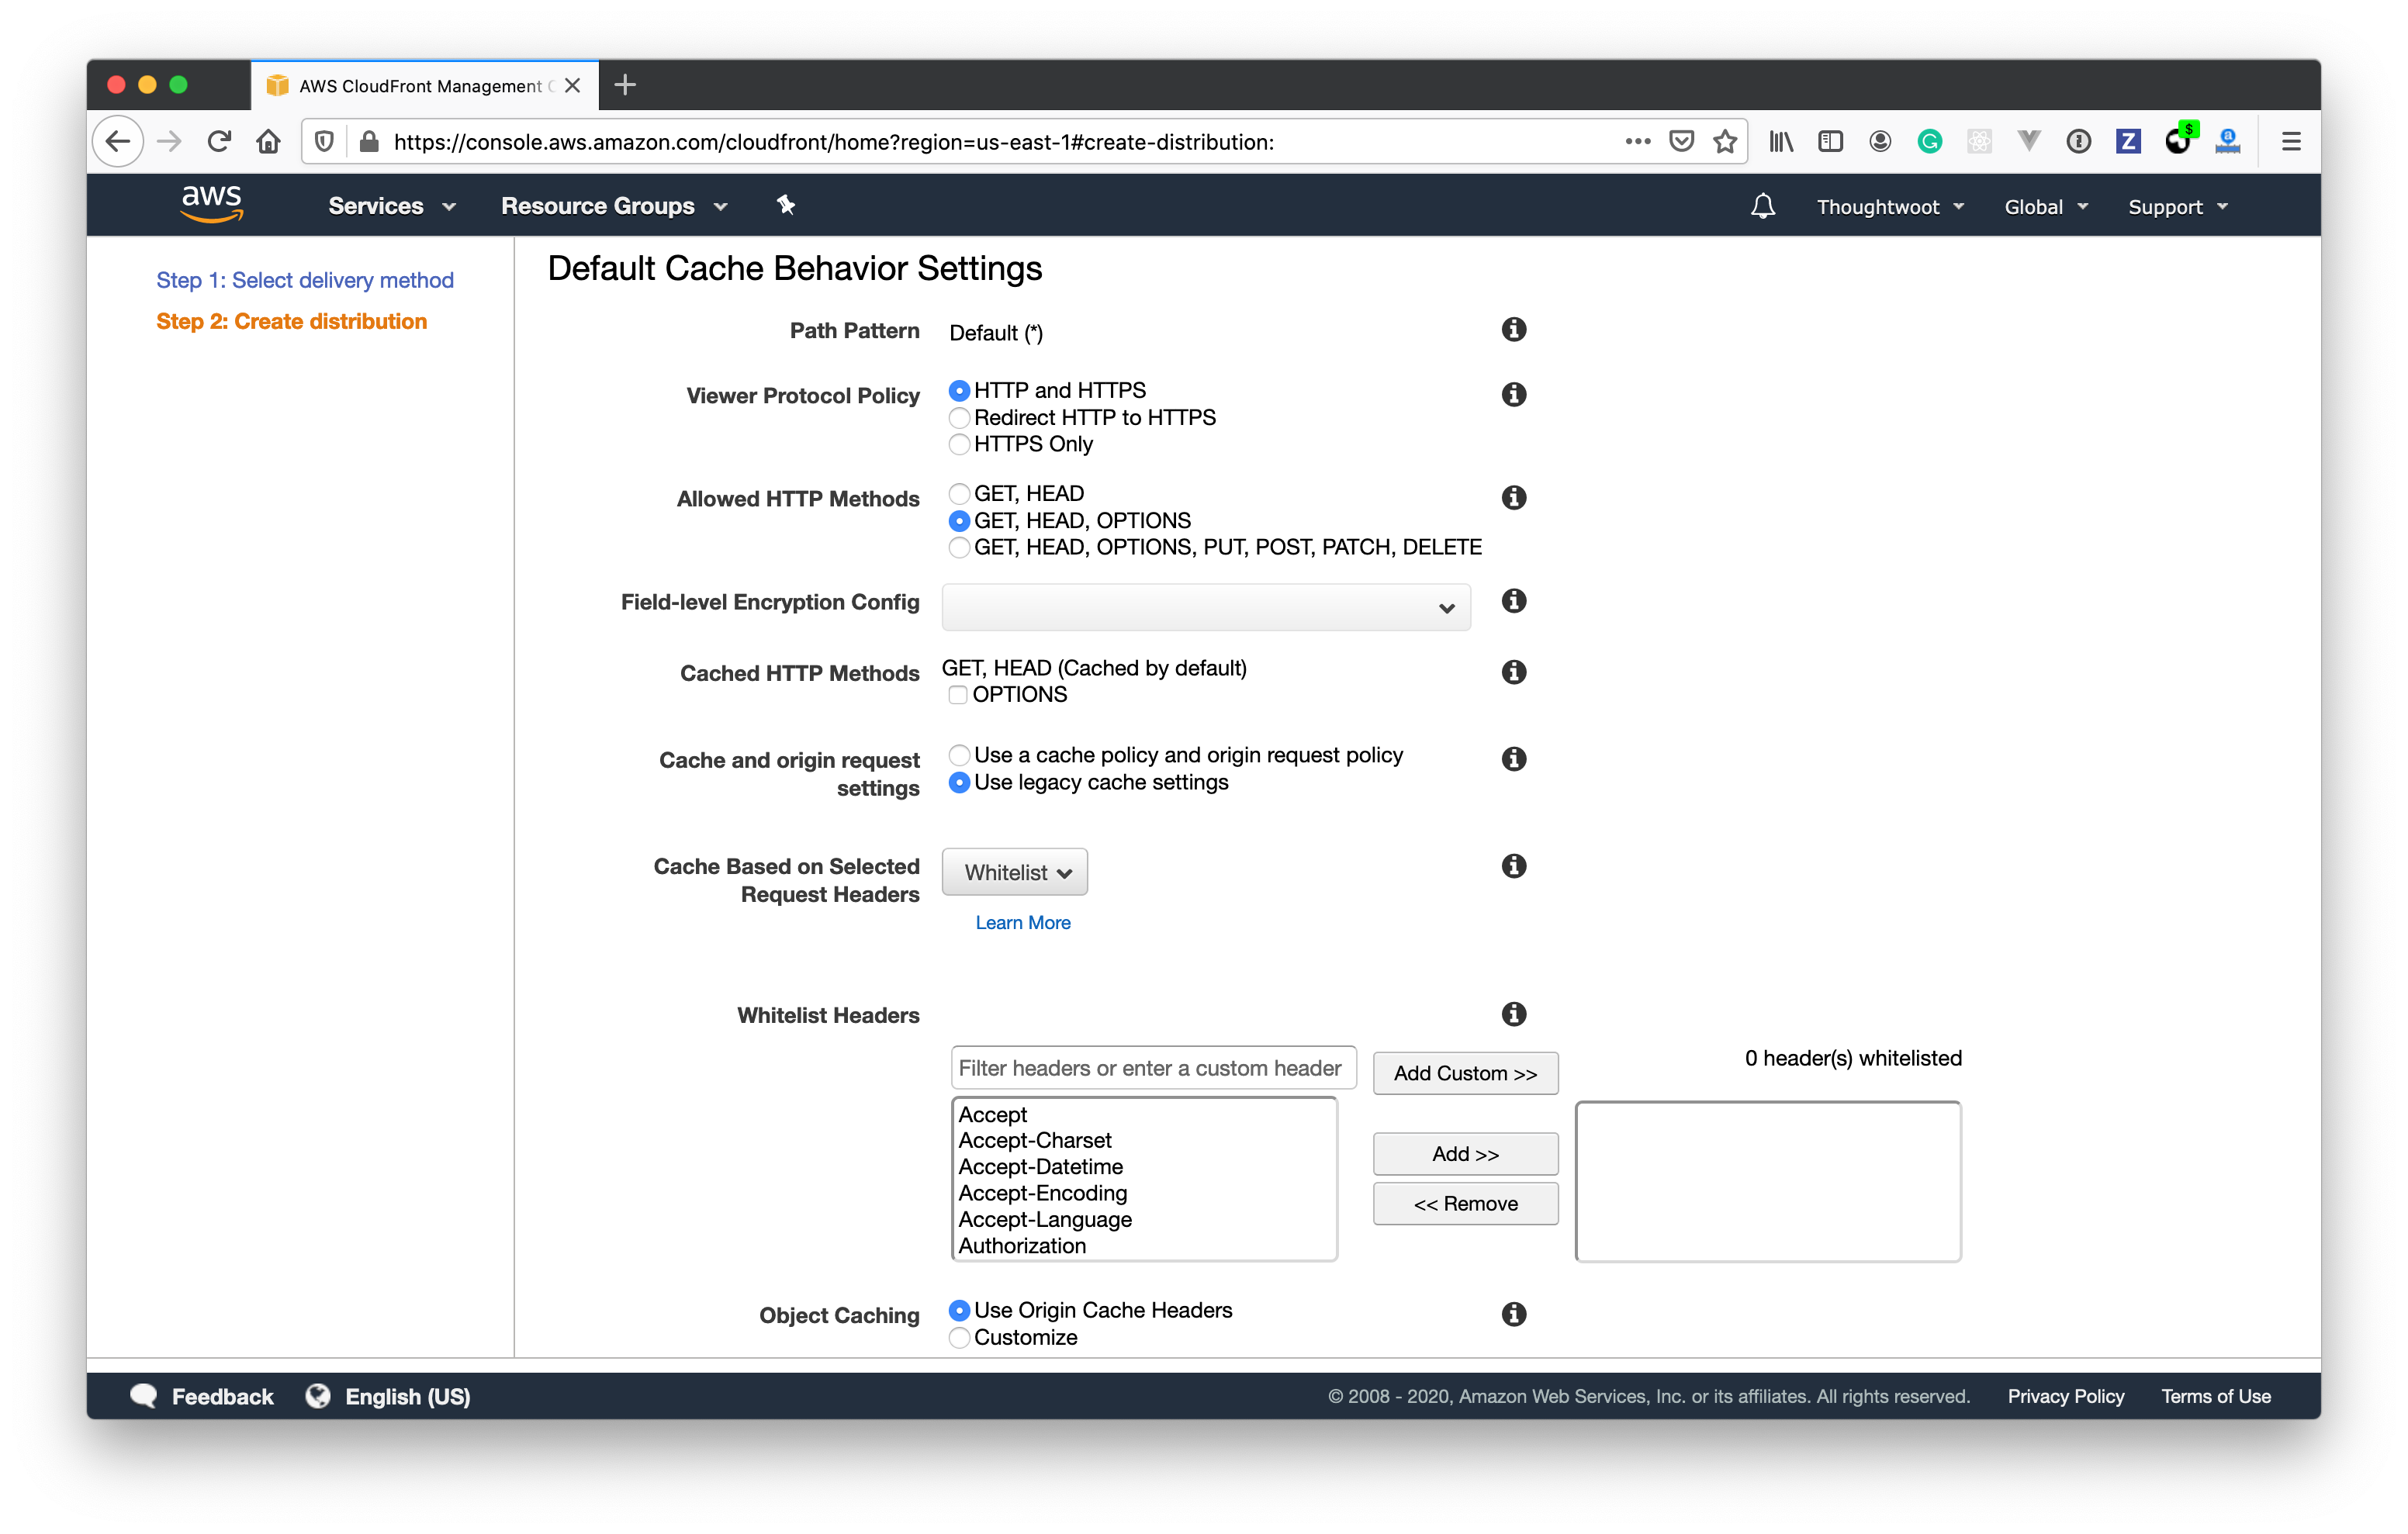
- Configure Allowed HTTP methods to use GET, HEAD, OPTIONS.
- Configure Cache and origin request settings to use Use legacy cache settings.
- Select Whitelist for Cache Based on Selected Request Headers.
- Add the following headers to the Whitelist Headers.
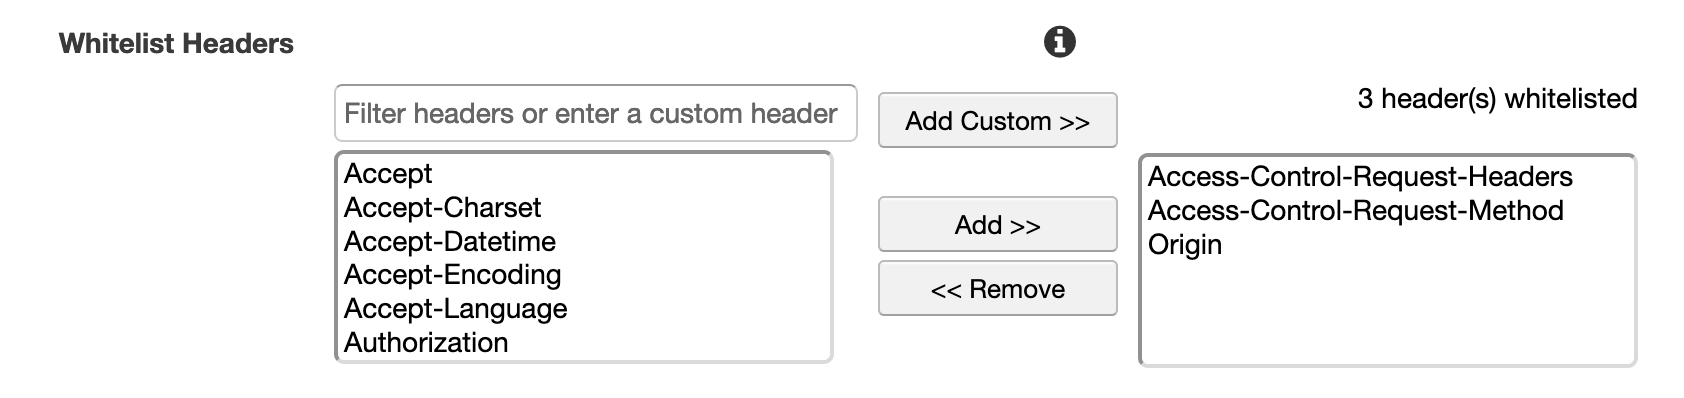
- Access-Control-Request-Headers
- Access-Control-Request-Method
- Origin
- Set the Response headers policy to CORS-With-Preflight

Add ASSET_CDN_HOST in Chatwoot
Your Cloudfront URL will be of the format<distribution>.cloudfront.net.
Set
Benefits of Using CDN
- Faster Asset Loading: Assets are served from edge locations closer to users
- Reduced Server Load: Static assets are served from CDN, reducing load on your application server
- Better User Experience: Faster page load times improve user experience
- Global Availability: Assets are cached globally for users worldwide
- Bandwidth Savings: Reduces bandwidth usage on your origin server
Troubleshooting
CORS Issues
If you encounter CORS issues after setting up CloudFront:- Ensure the CORS headers are properly configured in CloudFront
- Verify that your
CORS_ORIGINSenvironment variable includes your CDN domain:
Cache Invalidation
To invalidate CloudFront cache after updating assets:- Go to CloudFront console
- Select your distribution
- Create an invalidation for
/*to clear all cached assets
SSL Certificate
For custom domain names with CloudFront:- Request an SSL certificate in AWS Certificate Manager (ACM)
- Configure the certificate in your CloudFront distribution
- Update your DNS to point to the CloudFront distribution
SSL certificates for CloudFront must be requested in the US East (N. Virginia) region regardless of where your distribution is located.